
Welcome to the ultimate guide on the exciting addition of copper to the world of Minecraft! With its unique properties and versatile applications, copper has opened up a world of possibilities for players to explore. In this comprehensive guide, we will uncover the many uses and functionalities of copper within the game.
Mining copper ore is the first step in your copper journey. We will discuss the ideal mining level, the tools required, and effective strategies to gather this valuable resource efficiently. Once you have acquired copper ore, the next step is smelting it into copper ingots. We’ll explore the smelting process, including furnace usage and the properties of copper ingots.
Copper blocks offer both aesthetic and functional advantages in Minecraft’s building mechanics. We’ll delve into the various ways you can incorporate copper blocks into your structures, adding a touch of elegance and uniqueness to your creations.
1. Mining Copper Ore
Mining copper ore is the essential first step in obtaining this valuable resource. Copper ore can be found in various locations within the Minecraft world, and with the right tools and techniques, you can efficiently gather it for further processing.
Locating Copper Ore:
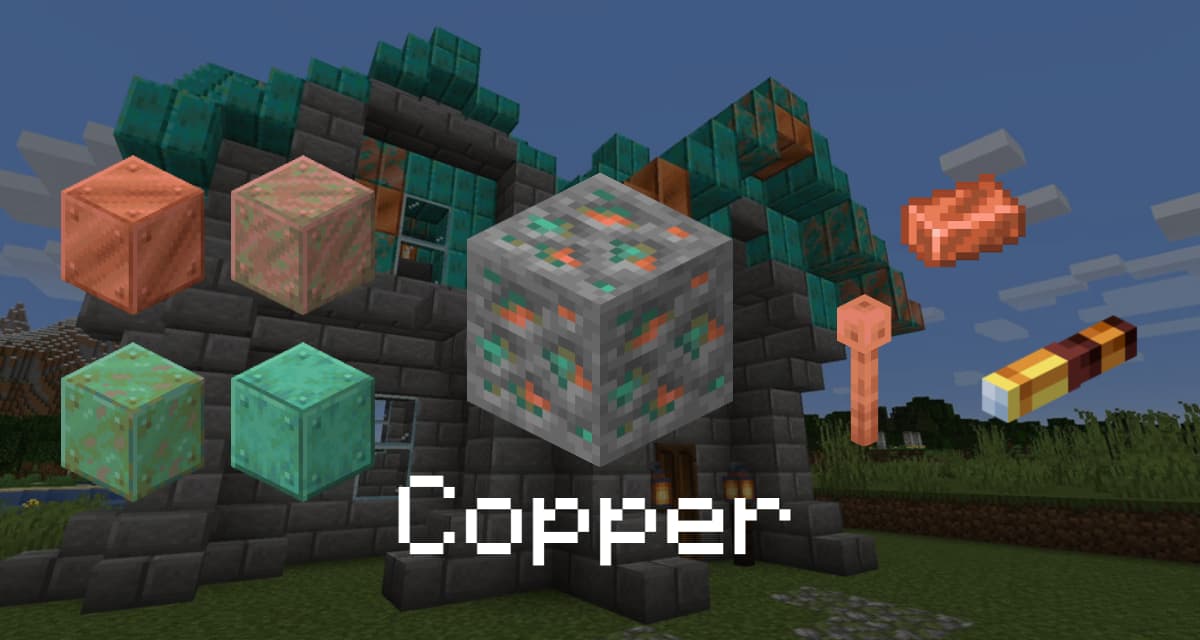
Copper ore is primarily found in the Overworld, typically at lower depths. It generates in large, somewhat circular clusters between Y-levels 0 and 96. Look for a distinctive orange-brown color and a block texture that resembles stone with green speckles.
Required Tools:
To mine copper ore, you will need at least a stone pickaxe or any higher-tier pickaxe, such as iron, diamond, or netherite. Wooden and gold pickaxes are not strong enough to break the copper ore blocks.
Mining Strategies:
Here are some strategies to optimize your copper ore mining:
a. Branch Mining: Create a series of tunnels at the optimal depth (usually between Y-levels 40 and 50) with a gap of 2 blocks between each tunnel. This method maximizes your chances of finding copper ore clusters.
b. Cave Exploration: Explore caves and ravines at the right depth range to discover exposed copper ore blocks. This approach can be more time-efficient as it leverages existing openings.
c. Strip Mining: Clearing large areas on a single level can also expose copper ore. Create long corridors, removing all non-essential blocks in your path.
Efficient Resource Gathering:
To maximize your copper ore yield, consider the following tips:
a. Fortune Enchantment: Enchanting your pickaxe with the Fortune enchantment (Fortune III, if possible) increases the number of copper ore dropped when mined.
b. Torch Placement: Placing torches every few blocks can help prevent hostile mob spawns, ensuring your safety while mining.
c. Inventory Management: Keep your inventory organized by using chests and shulker boxes to store excess resources, allowing you to mine uninterrupted.
2. Smelting and Obtaining Copper Ingots
Once you have collected a satisfactory amount of copper ore, the next step is to smelt it into copper ingots. Smelting is the process of using a furnace to convert raw ore into a more refined and usable form. Here’s how you can smelt copper ore and obtain copper ingots in Minecraft:
Crafting a Furnace:
Before you can begin smelting, you need to craft a furnace. The recipe for a furnace is straightforward: arrange 8 cobblestone blocks in a square shape within the crafting table.
Gathering Fuel:
To power the furnace, you will need a fuel source. Suitable fuels include coal, charcoal, wood, blaze rods, and even dried kelp blocks. Each fuel item has a specific smelting duration, so consider using an efficient fuel source to maximize your smelting process.
Placing the Furnace:
Place the furnace in a convenient location, such as near your mining area or base. Right-click on the ground or on a block to position the furnace.
Smelting Copper Ore:
- a. Open the furnace by right-clicking on it. You will see two slots: the top slot is for inputting the copper ore, and the bottom slot is for the fuel source.
- b. Place the copper ore in the top slot of the furnace. You can smelt multiple ores simultaneously by filling the entire top slot with copper ore.
- c. Add the chosen fuel source to the bottom slot of the furnace. One piece of fuel is sufficient to smelt eight items in the top slot.
- d. The furnace will start the smelting process, and the progress bar will indicate the remaining time.
- e. Once the smelting process is complete, the copper ingots will appear in the result slot. Collect the copper ingots by left-clicking or dragging them into your inventory.
Utilizing Blast Furnaces:
An alternative method to smelt copper ore is by using a blast furnace. The blast furnace smelts copper ore at a faster rate compared to a regular furnace but requires the use of specific fuel sources like coal or charcoal. The process for smelting copper ore in a blast furnace is similar to that of a regular furnace.
Copper Ingots and Stacks:
Copper ingots are now ready for use in various crafting recipes and applications within the game. Each copper ore smelts into a single copper ingot. Copper ingots stack up to 64 in a single inventory slot, allowing for efficient storage and transportation.
3. Building with Copper Blocks
Copper blocks offer a unique and aesthetically pleasing addition to your Minecraft builds. With their distinctive orange-brown color and aging properties, copper blocks can add a touch of elegance and creativity to your structures. In this section, we will explore various ways to incorporate copper blocks into your builds and showcase their versatility.
Crafting Copper Blocks:
To craft copper blocks, you will need nine copper ingots arranged in a 3×3 grid within the crafting table. Each crafted copper block requires nine copper ingots, making it an efficient use of your copper resources.
Weathering and Aging:
One unique aspect of copper blocks is their ability to weather and change color over time. When placed in the game world, copper blocks will initially have a vibrant orange hue. However, over time, they will gradually oxidize and develop a greenish patina, adding a sense of realism and character to your builds. If you prefer to preserve the original color, you can wax the copper blocks (using honeycomb) to prevent further oxidation.
Exterior Design:
Copper blocks can be used effectively in exterior designs, adding a warm and inviting atmosphere to your buildings. Consider incorporating copper blocks into roofs, pillars, trimmings, or even as an accent material for specific architectural features. Combine them with other blocks like stone, wood, or terracotta to create visually appealing contrasts.
Interior Design:
Copper blocks can also be utilized creatively in interior designs, bringing a touch of sophistication and elegance to your living spaces. Use copper blocks as flooring, wall panels, or even as a decorative element such as statues or chandeliers. Combine them with other blocks and materials to create unique and eye-catching interiors.
Landscaping:
Don’t limit the use of copper blocks to just buildings. Incorporate them into your landscaping projects to add visual interest and diversity to your outdoor environments. Use copper blocks to construct pathways, garden borders, or decorative structures in gardens and parks. Their natural color and weathering properties can blend seamlessly with natural elements like grass, flowers, and trees.
Redstone Contraptions:
Copper blocks can also be integrated into redstone contraptions, offering functional and visually appealing solutions. Their unique appearance can be utilized to create circuit boards, wiring systems, or decorative features in your redstone creations.
Combination with Other Blocks:
Experiment with combining copper blocks with other blocks and materials to achieve unique textures and color palettes. For example, combining copper blocks with stone bricks, oak planks, or quartz can create striking visual combinations.
4. Crafting Copper Tools and Armor
Copper not only offers aesthetic appeal but can also be used to create functional tools and armor in Minecraft. In this section, we will explore how to craft copper tools and armor, their unique properties, and the benefits they provide.
Crafting Copper Ingots:
Before we begin crafting tools and armor, ensure you have obtained an adequate supply of copper ingots through smelting copper ore using a furnace or blast furnace, as explained in the previous section.
Crafting Copper Tools:
To craft copper tools, follow these steps:
a. Crafting Table: Start by opening your crafting table, which can be created using four wooden planks arranged in a 2×2 grid in the crafting table.
b. Tool Recipes: Use the copper ingots to craft the desired tools using the following recipes:
- Copper Pickaxe: Place three copper ingots in the top row and two sticks in the middle and bottom center slots.
- Copper Axe: Arrange three copper ingots in the top row and two sticks in the middle and bottom center slots.
- Copper Shovel: Put one copper ingot in the top row and two sticks in the middle and bottom center slots.
- Copper Hoe: Arrange two copper ingots in the top row and two sticks in the middle and bottom center slots.
- Copper Sword: Place two copper ingots in the middle row and one stick in the bottom center slot.
c. Drag and Drop: Once the correct arrangement is made in the crafting grid, drag the crafted tool into your inventory.
Properties of Copper Tools:
Copper tools possess unique characteristics that set them apart from other materials in Minecraft:
a. Durability: Copper tools have moderate durability, ranking between wooden and stone tools. They are less durable than iron, diamond, and netherite tools.
b. Mining Speed: Copper tools have a mining speed equivalent to stone tools, making them suitable for mining basic resources like stone, coal, and ores.
c. Enchantability: Copper tools have a high enchantability, allowing for more enchantment options and potentially powerful combinations.
Crafting Copper Armor:
Copper armor provides an additional layer of protection for your Minecraft character. Here’s how to craft copper armor:
a. Crafting Table: Open your crafting table.
b. Armor Recipes: Use copper ingots to craft the desired armor pieces using the following recipes:
- Copper Helmet: Fill the top row of the crafting grid with copper ingots.
- Copper Chestplate: Place three copper ingots across the top row, followed by three ingots in the middle row, and leave the bottom row empty.
- Copper Leggings: Arrange three copper ingots in the middle row, leaving the top and bottom rows empty.
- Copper Boots: Fill the bottom row of the crafting grid with copper ingots.
c. Drag and Drop: Once the correct arrangement is made, drag the crafted armor piece into your inventory.
Properties of Copper Armor:
Copper armor offers moderate protection and durability. Its defensive capabilities are slightly higher than leather armor but lower than iron, diamond, and netherite armor. It is a viable option for early-game armor, offering reasonable protection while using fewer resources.
5. Utilizing Copper in Redstone Contraptions
Copper, with its conductivity and unique aging properties, opens up exciting possibilities for incorporating it into redstone contraptions in Minecraft. In this section, we will explore how you can utilize copper in various redstone mechanisms and devices, adding both functionality and visual appeal to your creations.
Copper Wire and Circuits:
One of the key applications of copper in redstone contraptions is as wiring material. Copper blocks can be used as decorative circuit boards or as a pathway for redstone signals. Create intricate designs and patterns by using copper blocks as a base for your redstone circuitry.
Redstone Transmission:
Copper blocks can serve as a conductor for transmitting redstone signals over longer distances. By placing copper blocks adjacent to each other, you can create an extended path for redstone signals without needing to rely solely on redstone dust. This can help in organizing and simplifying your redstone wiring.
Copper Pressure Plates:
Crafting copper pressure plates allows you to incorporate redstone functionality into your builds in a more discreet and seamless manner. Copper pressure plates are activated when a player or entity stands on them, sending a redstone signal. You can use these plates to create hidden doors, traps, or activate specific mechanisms in your redstone contraptions.
Decorative Components:
Utilize copper blocks, copper buttons, or copper trapdoors as decorative components in your redstone contraptions. Copper adds a unique touch of elegance and style to your mechanisms, making them visually appealing while maintaining functionality.
Comparator Signal Strength:
Copper blocks can be used with redstone comparators to measure the signal strength of different redstone inputs. By placing copper blocks in various configurations, you can manipulate the signal strength and create advanced redstone mechanisms like pulse limiters, item sorters, or item filters.
Clocks and Timers:
Copper blocks can be integrated into redstone clocks and timers. By utilizing copper blocks as part of the timing mechanism, you can create precise and customizable delays in your redstone contraptions. This can be useful for controlling the activation of various components or creating sequential events.
Aesthetics and Design:
In addition to functionality, copper blocks can enhance the aesthetics of your redstone contraptions. Incorporate them into the design of your redstone devices to create visually appealing and cohesive structures. Combine copper blocks with other building materials and redstone components to achieve unique and stunning results.
6. Using Copper in Potions and Brewing
Copper in Minecraft can also play a role in the world of potions and brewing, offering unique effects and possibilities. In this section, we will explore how copper can be utilized in the brewing process to create potions with special properties and enhance your gameplay experience.
Obtaining Copper-related Items:
Before delving into the brewing process, it’s important to gather the necessary copper-related items:
a. Copper Ingots: Smelt copper ore in a furnace or blast furnace to obtain copper ingots, as explained in earlier sections.
b. Copper Blocks: Craft copper blocks using copper ingots arranged in a 3×3 grid within the crafting table.
c. Cauldron: Obtain or craft a cauldron using seven iron ingots arranged in a U-shape within the crafting table. Cauldrons are essential for brewing certain potions.
Aging and Oxidation Effects:
Copper blocks have a unique property of aging and oxidation. You can utilize this property in the brewing process to create special potions:
a. Aging: By placing a copper block beneath a cauldron filled with water, you can accelerate the aging process of potions. This affects the duration and strength of the brewed potions.
b. Oxidation: When a cauldron containing water and a copper block is exposed to the open sky, the copper oxidizes over time, creating a greenish hue in the water. You can collect this oxidized potion for use in brewing.
Creating Oxidized Potions:
To create oxidized potions using copper blocks, follow these steps:
- a. Place a cauldron in an outdoor area exposed to the sky.
- b. Fill the cauldron with water by right-clicking on it while holding a water bucket.
- c. Add a copper block to the cauldron by right-clicking on the cauldron with a copper block in hand.
- d. Wait for the water in the cauldron to oxidize. This process may take some time, and you will see the water turning greenish in color.
- e. Right-click on the cauldron while holding glass bottles to collect the oxidized potion.
Brewing with Copper-related Items:
Once you have obtained the oxidized potion or other copper-related items, you can use them in the brewing process to create unique potions:
a. Brewing Stand: Set up a brewing stand using blaze rods and cobblestone. Place the brewing stand on a solid surface.
b. Base Potions: Start with base potions by brewing mundane potions using nether wart and water bottles.
c. Adding Ingredients: Add the desired ingredients, including oxidized potions or other copper-related items, to the brewing stand. These ingredients will impart specific effects to the potions.
d. Brewing Time: Wait for the brewing process to complete. The brewing stand will produce potions with the added effects of the ingredients used.
e. Collecting Potions: Once the brewing is finished, use glass bottles to collect the brewed potions from the brewing stand.
f. Experiment and Combine: Feel free to experiment and combine different ingredients, including copper-related items, to create potions with unique properties and effects.
Potion Effects:
The effects of the brewed potions will depend on the ingredients used, including any copper-related items. Copper can add duration, strength, or unique characteristics to the potions, providing you with new abilities and advantages in the game.
In Conclusion
Copper is a versatile and valuable resource in Minecraft that offers a wide range of possibilities for players. From its uses in construction and redstone contraptions to its role in potion brewing, copper adds depth and creativity to the game.
Copper blocks provide a visually appealing option for adding elegance and character to your buildings. Whether it’s incorporating copper blocks into roofs, pillars, or as decorative elements, the aging properties of copper bring a sense of realism to your structures.
When it comes to redstone contraptions, copper’s conductivity and unique aging effects come into play. You can use copper blocks as wiring material, create circuit boards, transmit redstone signals, and design intricate timing mechanisms. Copper adds both functionality and aesthetic appeal to your redstone creations.


