
Minecraft Java Edition, renowned for its boundless creativity and expansive worlds, has captivated gamers for years. While it offers an immersive experience through keyboard and mouse controls, many players yearn to elevate their gameplay by incorporating a controller. The tactile feel of a controller can add a new layer of enjoyment, especially for those accustomed to console gaming or seeking a different approach. Fortunately, with the evolution of Minecraft and the relentless dedication of the modding community, integrating controller support into the Java Edition has become a reality.
In this guide, we will delve into the process of seamlessly integrating controller support into your Minecraft Java Edition. While the game doesn’t natively support controllers, the Minecraft community has developed several ingenious solutions to bridge this gap. Whether you’re looking to build intricate structures, explore uncharted realms, or battle fearsome creatures, the intuitive nature of a controller can transform your experience.
The first section will explore the diverse motivations behind adding controller compatibility to Minecraft Java Edition. From ergonomic preferences to nostalgic associations with console gaming, each player’s reason for seeking this enhancement is unique. Understanding your own motivations can help guide your approach and tailor the controller setup to suit your needs.
The subsequent sections will guide you through the step-by-step process of setting up controller support. We’ll begin by introducing various third-party software and mods that enable controller compatibility. These tools bridge the divide between the game and your controller, unlocking a new realm of possibilities. Whether you opt for existing mods or wish to delve into the world of Java coding to create your own, we’ll provide insights to make the process accessible.
Finally, we’ll discuss customization and optimization. Mapping controller buttons, adjusting sensitivity, and fine-tuning your setup are pivotal to a seamless transition from keyboard and mouse to controller. We’ll also address potential challenges and offer troubleshooting tips to ensure a smooth and rewarding experience.
Embracing controller support in Minecraft Java Edition is a transformative journey that harmonizes the best of both worlds. By following this guide, you’ll embark on a path that brings a fresh perspective to your gameplay, enabling you to delve into the Minecraft universe with enhanced comfort and precision. So, let’s embark on this adventure together and unlock the true potential of controller-supported Minecraft Java Edition.
Using a Third-Party Mod to Add Controller Support to Minecraft Java
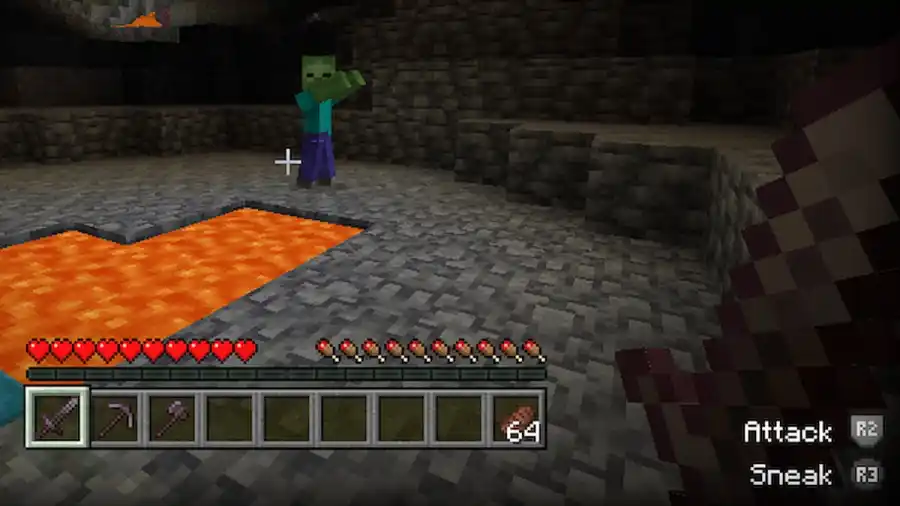
Adding controller support to Minecraft Java Edition involves using third-party mods that bridge the gap between the game and your desired controller. While the Java Edition does not offer native controller support, the vibrant modding community has developed solutions to enable this feature. Here’s a step-by-step guide on how to achieve this:
- Research and Choose a Mod: Begin by researching the various mods available for adding controller support to Minecraft Java Edition. Popular options like “Joypad Mod,” “Controller Support,” or “Mine Control” offer different functionalities and compatibility. Consider factors such as the mod’s version, user reviews, and the features it offers.
- Download and Install Minecraft Forge: Most controller mods require Minecraft Forge, a modding platform that facilitates the installation and management of mods. Visit the official Minecraft Forge website and download the version compatible with your Minecraft installation.
- Install the Mod: Once you have Minecraft Forge installed, locate the mod you’ve chosen for controller support. Download the mod file from a reputable source. Be cautious of unofficial websites to avoid malware. Place the downloaded mod file into the “mods” folder within your Minecraft directory.
- Launch Minecraft with Forge: Start the Minecraft Launcher and select the Forge profile you’ve set up. This version of Minecraft will have Forge and the controller mod installed.
- Configure the Mod: Launch Minecraft with the Forge profile and navigate to the game’s options or settings menu. Look for the controller mod’s settings to configure the controller inputs and sensitivity to your liking. You may need to assign buttons to in-game actions, similar to how you’d configure controls for a console game.
- Connect and Calibrate Your Controller: Ensure your controller is connected to your computer. The mod may require you to calibrate the controller for accurate input detection. Follow any on-screen prompts or instructions provided by the mod.
- Test and Refine: Enter your Minecraft world and test the controller inputs. Pay attention to how the controls feel and make adjustments as needed. You might need to fine-tune sensitivity settings or button mappings to suit your preferences.
- Explore Additional Features: Some controller mods offer additional features beyond basic input mapping, such as touchpad support, gyroscopic controls, or advanced customization. Explore these features to enhance your gameplay experience further.
- Stay Updated: Keep an eye on the mod’s updates and compatibility with new versions of Minecraft. As the game updates, mods might require updates as well to maintain compatibility.
- Troubleshooting: If you encounter issues or unexpected behavior, refer to the mod’s documentation or support resources. The modding community often provides forums or online communities where you can seek help.
By following these steps, you can seamlessly integrate controller support into Minecraft Java Edition using a third-party mod. This opens up a new dimension of gameplay, enabling you to explore the blocky world of Minecraft in a whole new way. Remember that modding involves third-party software and is not officially supported by Mojang, so proceed with caution and ensure you’re using reputable sources for both mods and modding tools.
Adding Controller Support to Minecraft Java on Windows 10/11
Adding controller support to Minecraft Java Edition on Windows 10 or 11 involves using third-party tools and software to bridge the gap between the game and your controller. Since Minecraft Java Edition doesn’t offer native controller support, you’ll need to rely on external solutions. Here’s a step-by-step guide to help you through the process:
- Choose a Third-Party Tool: There are various third-party tools available that allow you to map your controller inputs to keyboard and mouse actions. Some popular options include JoyToKey, Xpadder, and Antimicro. Research and choose a tool that suits your preferences and is compatible with your controller.
- Download and Install the Third-Party Tool: Visit the official website of the tool you’ve chosen and download the appropriate version for your Windows operating system (Windows 10 or 11). Follow the installation instructions provided by the tool.
- Connect Your Controller: Connect your controller to your Windows PC using a USB cable or Bluetooth, depending on your controller type. Ensure that Windows recognizes and properly installs the controller drivers.
- Configure the Third-Party Tool:
- Launch the third-party tool you installed.
- Create a new profile or configuration for Minecraft Java Edition.
- Map the controller buttons to keyboard and mouse inputs. Assign keys to mimic the actions you would perform in the game using a keyboard and mouse.
- Save the configuration/profile.
- Launch Minecraft Java Edition:
- Start the Minecraft Launcher.
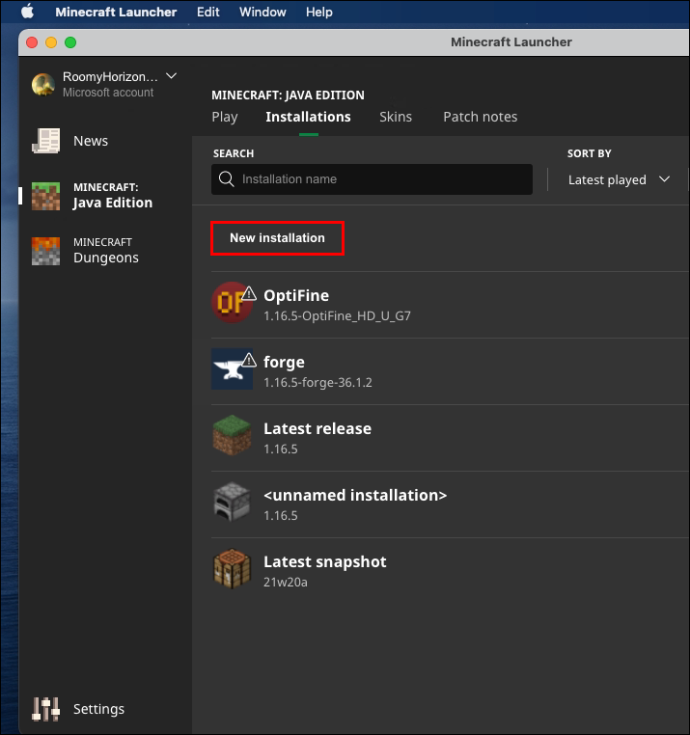
- Click on “Installations” and create a new installation or edit an existing one.
- Under the “More Options” section, make sure to select the version of Minecraft you want to play with controller support.
- In the “JVM Arguments” field, add the following line:
-Dminecraft.launcher.brand=vanilla -Dminecraft.launcher.version=1.17.1
Replace “1.17.1” with the version of Minecraft you’re using.
- Launch the Game with the Third-Party Tool:
- Open the third-party tool you configured.
- Start the profile/configuration you created for Minecraft.
- Leave the tool running in the background while you play.
- Test and Adjust:
- Launch Minecraft Java Edition using the profile you set up.
- Test the controller inputs in the game to ensure they are working as intended.
- If needed, adjust the button mappings or sensitivity in the third-party tool to optimize your gameplay experience.
- Stay Updated:
- Keep an eye on updates for both Minecraft Java Edition and the third-party tool. Updates to either might impact compatibility.
Remember that third-party tools are not officially supported by Mojang, and there might be occasional limitations or compatibility issues. Additionally, the steps provided here are general guidelines, and the specifics might vary based on the tool you choose. Always download tools from reputable sources to avoid malware or other security risks. With patience and some tweaking, you can enjoy Minecraft Java Edition with controller support on your Windows 10 or 11 system.
Adding Controller Support in Minecraft on a Mac
Adding controller support to Minecraft on a Mac involves using third-party software to map your controller inputs to keyboard and mouse actions, as Minecraft Java Edition doesn’t natively support controllers. Here’s a step-by-step guide to help you through the process:
- Choose a Third-Party Software: Select a third-party software that enables you to map your controller to keyboard and mouse inputs. Some popular options for Mac include Enjoy2, Joystick Mapper, and ControllerMate. Research and choose a tool that is compatible with your controller and suits your preferences.
- Download and Install the Third-Party Software:
- Visit the official website of the software you’ve chosen.
- Download the appropriate version for macOS.
- Follow the installation instructions provided by the software.
- Connect Your Controller:
- Connect your controller to your Mac using a USB cable or Bluetooth, depending on your controller type.
- Ensure that macOS recognizes and properly installs the controller drivers.
- Configure the Third-Party Software:
- Launch the third-party software you installed.
- Create a new profile or configuration for Minecraft Java Edition.
- Map the controller buttons to keyboard and mouse inputs. Assign keys to simulate the actions you would perform in the game using a keyboard and mouse.
- Save the configuration/profile.
- Launch Minecraft Java Edition:
- Open the Minecraft Launcher.
- Click on “Installations” and create a new installation or edit an existing one.
- Under the “More Options” section, select the version of Minecraft you want to play with controller support.
- In the “JVM Arguments” field, add the following line:
-Dminecraft.launcher.brand=vanilla -Dminecraft.launcher.version=1.17.1
Replace “1.17.1” with the version of Minecraft you’re using.
- Launch the Game with the Third-Party Software:
- Open the third-party software you configured.
- Start the profile/configuration you created for Minecraft.
- Keep the software running while you play.
- Test and Adjust:
- Launch Minecraft Java Edition using the profile you set up.
- Test the controller inputs in the game to ensure they work as intended.
- If necessary, adjust the button mappings or sensitivity in the third-party software to optimize your gaming experience.
- Stay Updated:
- Keep an eye on updates for both Minecraft Java Edition and the third-party software. Updates to either might affect compatibility.
Please note that third-party software solutions might have occasional limitations or compatibility issues. The steps provided are general guidelines, and the specifics could vary based on the software you choose. Always download software from reputable sources to avoid security risks. With some patience and configuration, you can enjoy Minecraft Java Edition with controller support on your Mac system.
Adding Controller Support to Minecraft on Linux
Adding controller support to Minecraft on Linux involves using third-party software to map your controller inputs to keyboard and mouse actions. As Minecraft Java Edition doesn’t have native controller support, this method allows you to play the game with a controller on your Linux system. Here’s a step-by-step guide to help you get started:
- Choose a Third-Party Software: Select a third-party software that allows you to map your controller inputs to keyboard and mouse inputs. Some popular options for Linux include AntiMicroX, SC Controller, and Steam’s built-in controller support. Choose a tool that suits your preferences and is compatible with your controller.
- Install the Third-Party Software:
- Open your Linux package manager or terminal.
- Install the chosen third-party software using the appropriate package manager commands. For example:
sudo apt-get install antimicrox   # For AntiMicroX

sudo apt-get install sc-controller  # For SC Controller
- Follow any prompts to complete the installation.
- Connect Your Controller:
- Connect your controller to your Linux system using a USB cable or Bluetooth, depending on the type of controller you have.
- Ensure that your Linux system recognizes and properly installs the controller drivers.
- Configure the Third-Party Software:
- Launch the third-party software you installed.
- Create a new profile or configuration for Minecraft Java Edition.
- Map the controller buttons to keyboard and mouse inputs. Assign keys to simulate the actions you would perform in the game using a keyboard and mouse.
- Save the configuration/profile.
- Launch Minecraft Java Edition:
- Open the Minecraft Launcher.
- Click on “Installations” and create a new installation or edit an existing one.
- Under the “More Options” section, select the version of Minecraft you want to play with controller support.
- In the “JVM Arguments” field, add the following line:
-Dminecraft.launcher.brand=vanilla -Dminecraft.launcher.version=1.17.1
Replace “1.17.1” with the version of Minecraft you’re using.
- Launch the Game with the Third-Party Software:
- Open the third-party software you configured.
- Start the profile/configuration you created for Minecraft.
- Keep the software running while you play.
- Test and Adjust:
- Launch Minecraft Java Edition using the profile you set up.
- Test the controller inputs in the game to ensure they work as intended.
- If necessary, adjust the button mappings or sensitivity in the third-party software to optimize your gaming experience.
- Stay Updated:
- Keep an eye on updates for both Minecraft Java Edition and the third-party software. Updates to either might affect compatibility.
Please note that third-party software solutions may have occasional limitations or compatibility issues. The steps provided here are general guidelines, and the specifics could vary based on the software you choose. Always download software from reputable sources and ensure you’re using compatible versions for your Linux distribution. With some patience and configuration, you can enjoy Minecraft Java Edition with controller support on your Linux system.
Conclusion!
In conclusion, while Minecraft Java Edition doesn’t offer native controller support, you can enhance your gameplay experience by incorporating third-party tools to map your controller inputs to keyboard and mouse actions. This process allows you to play the game with a controller on your preferred platform, whether it’s Windows, macOS, or Linux.


