
Minecraft, the iconic sandbox game loved by millions around the world, offers players an endless realm of creativity and exploration. One of the most exciting ways to personalize the Minecraft experience is by obtaining and applying skins to your in-game character. Skins allow players to transform their blocky avatars into unique and eye-catching figures, ranging from classic game characters to mythical creatures and even self-designed masterpieces. In this guide, we will explore the various methods to acquire Minecraft skins, unlocking a universe of possibilities to express your individuality within the virtual world.
For those playing Minecraft’s Bedrock Edition, the official Minecraft Marketplace is a treasure trove of skins created by talented designers. The Marketplace offers an extensive array of pre-made skins featuring popular characters from various franchises, animals, historical figures, and more. Delve into the marketplace, browse through the catalog, and choose the skins that resonate with your preferences and personality. While some skins may be free of charge, others might require using in-game currency, adding an exciting twist to your acquisition journey.
The Minecraft community is a vibrant hub of creativity, and countless websites are dedicated to sharing an ever-growing collection of user-created skins. These websites present an opportunity to explore an immense variety of skins, each meticulously crafted by fellow players. Whether you’re seeking a trendy outfit or a daring hero, these platforms offer an impressive diversity of skins to suit your unique taste. Download your favorite skins in PNG format and infuse your character with a distinct flair that sets you apart in the vast and blocky landscapes.
Venture into the realm of self-expression and unleash your creativity by crafting custom skins. Dedicated skin creator apps and online editors allow you to design your own unique skin from scratch. These tools empower you to personalize every aspect of your avatar, from facial expressions and hairstyles to clothing and accessories. Create a skin that embodies your imagination, aligning with your aspirations, or simply representing the version of yourself you’d like to be in the Minecraft universe.
Sometimes, you may come across a pre-made skin that captivates your attention but requires a minor tweak or two to fit your vision perfectly. Don’t hesitate to utilize image editing software or online editors to make subtle adjustments and make the skin truly your own.
With the wealth of resources available at your fingertips, obtaining skins in Minecraft becomes an exhilarating journey of self-discovery and artistry. Allow your avatar to reflect your individuality, stand out in multiplayer realms, and embark on adventures in the pixelated wonders of Minecraft. Embrace the possibilities, and let your creativity flourish in this ever-evolving block-building realm. Happy skinning!
Download Skins in Minecraft Sep-by-Step guide
Changing your Minecraft skin can be an exciting way to personalize your in-game character and stand out among other players. Whether you want to use a pre-made skin or design your custom look, this step-by-step guide will walk you through the process of downloading and applying skins in Minecraft.
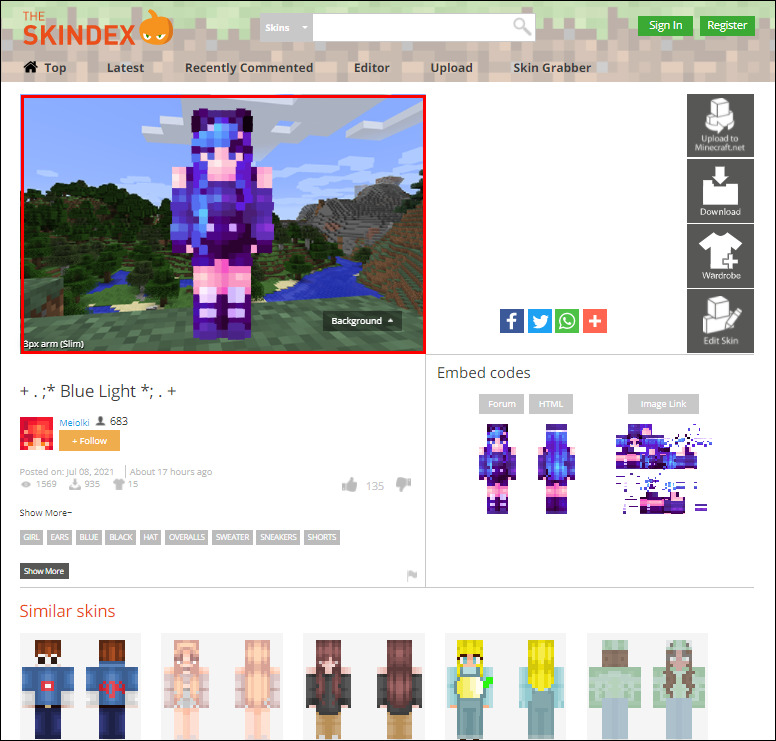
Step 1: Find a Skin Source: The first step is to find a website or platform that offers Minecraft skins for download. There are numerous websites where you can browse and choose from a wide variety of pre-made skins or create your custom skin using skin editors. Popular skin sources include Minecraft Skin Studio, Name MC, and Planet Minecraft.
Step 2: Choose Your Skin: Browse through the skin source and find a skin that catches your eye or represents your desired in-game persona. Some websites allow you to preview the skin on a 3D model to see how it will look in Minecraft.
Step 3: Download the Skin: Once you’ve found the perfect skin, click on the “Download” or “Save” button to save the skin file to your computer. The skin file will usually be in PNG format.
Step 4: Access Minecraft Profile: Open the official Minecraft website (minecraft.net) and log in to your account. If you don’t have an account, create one for free.
Step 5: Navigate to the Skins Section: After logging in, click on your profile name or avatar image in the upper-right corner of the website. From the dropdown menu, select “Profile.” This will take you to your Minecraft profile settings.
Step 6: Upload the New Skin: Under the “Change how you look in Minecraft” section, click on the “Choose File” or “Select a File” button. Locate the downloaded skin file on your computer and click “Open” to upload it.
Step 7: Apply the Skin: Once the skin is uploaded, you will see a preview of your character with the new skin. Verify that it’s the one you want, and if you’re satisfied, click the “Upload” or “Change” button to apply the skin to your Minecraft account.
Step 8: Wait for the Changes: The changes may not be immediately visible in the game. Depending on server settings and other factors, it might take a few minutes to a few hours for the new skin to update.
Step 9: Enjoy Your New Look: Launch Minecraft, either in single-player mode or by joining a server, and enjoy your freshly customized character! You can now explore the vast world of Minecraft with your unique and personalized avatar.
Congratulations! You have successfully downloaded and applied a new skin to your Minecraft account. Feel free to change your skin whenever you like, expressing your creativity and style as you embark on new adventures in the blocky universe of Minecraft. Happy crafting!
How to change your Minecraft skins on mobile
Changing your Minecraft skins on mobile devices is a straightforward process. Whether you’re using an Android or iOS device, Follow this step-by-step guide to customize your in-game character with a new skin:
Step 1: Choose a Skin Source: Before changing your Minecraft skin, find a skin that you like. You can browse various skin websites or use skin editor apps available on app stores to create your custom skin.
Step 2: Download the Skin: Once you’ve found the desired skin, download it to your mobile device. Ensure that the skin file is in PNG format, as this is the format supported by Minecraft.
Step 3: Install “Minecraft Skin Apps” (Optional): If you’re using an Android device, you may find apps on the Google Play Store specifically designed to change Minecraft skins. While these apps are convenient, make sure to choose a reputable one with good reviews and a history of safe use.
Step 4: Access Minecraft Pocket Edition (PE): Open the Minecraft Pocket Edition app on your mobile device. If you haven’t purchased it yet, download and install it from the respective app store.
Step 5: Go to the Skin Section: Once you’re in Minecraft PE, tap on the hanger icon (looks like a clothes hanger) or navigate to the “Profile” section in the game.
Step 6: Choose “Custom” or “Choose New Skin”: Select either the “Custom” option or “Choose New Skin,” depending on the version of Minecraft PE you are using.
Step 7: Upload the New Skin: In the skin editor, tap on “Choose File” or “Select a File” option and browse your device to find the downloaded skin. Once you’ve selected the skin, tap “Confirm” or “Upload” to apply it to your character.
Step 8: Wait for the Changes: It may take a few moments for the new skin to be applied to your character in the game. Be patient and give it a little time to update.
Step 9: Enjoy Your New Look: Now you can start playing Minecraft with your freshly changed skin! Explore the vast world, showcase your unique avatar to other players, and have fun in your personalized style.
Important Note: While changing Minecraft skins on mobile devices is generally safe, it’s essential to exercise caution when downloading files from external sources. Stick to reputable websites and apps to avoid potential security risks or unintended consequences.
With this guide, you can now easily change your Minecraft skins on your mobile device and showcase your individuality as you embark on countless adventures in the pixelated world of Minecraft! Happy crafting!
How to change your Minecraft skins on PC
Changing your Minecraft skin on PC is a simple process, and you can, Follow these steps to customize your in-game character:
Step 1: Choose a Skin Source: Before changing your Minecraft skin, find a skin that suits your style. You can search for pre-made skins on various websites or create a custom skin using skin editors.
Step 2: Download the Skin: Once you’ve found the skin you want, download it to your computer. Make sure the skin file is in PNG format, as Minecraft supports this format for skins.
Step 3: Access Minecraft Website: Open your preferred web browser and go to the official Minecraft website (minecraft.net).
Step 4: Log in to Your Account: If you already have a Minecraft account, log in using your credentials. If you don’t have an account, you’ll need to create one to change your skin.
Step 5: Navigate to the Skins Section: After logging in, click on your profile name or avatar in the upper-right corner of the website. From the dropdown menu, select “Profile.” This will take you to your Minecraft profile settings.
Step 6: Upload the New Skin: In the “Profile” section, you will see a section titled “Change how you look in Minecraft.” Here, you can upload the new skin. Click on the “Choose File” or “Select a File” button and locate the downloaded skin file on your computer. Once you’ve selected the skin file, click “Open” to upload it.
Step 7: Apply the Skin: After uploading the skin, you will see a preview of your character with the new skin. Check that it’s the one you want, and if you’re satisfied, click the “Upload” or “Change” button to apply the skin to your Minecraft account.
Step 8: Wait for the Changes: The changes may not be immediately visible in the game. Depending on server settings and other factors, it might take a few minutes to a few hours for the new skin to update.
Step 9: Enjoy Your New Look: Launch Minecraft on your PC and log in using your account. You should now see your character with the newly changed skin. You can start playing and exploring the Minecraft world with your customized avatar.
Congratulations! You’ve successfully changed your Minecraft skin on your PC. Feel free to switch skins as often as you like to showcase your creativity and style as you embark on exciting adventures in the blocky universe of Minecraft. Happy crafting!
Conclusion!
In conclusion, obtaining Minecraft skins is a relatively simple process that allows players to personalize their in-game characters and express their creativity within the Minecraft world. There are two primary methods to acquire skins: downloading pre-made skins from various websites or creating custom skins using skin editors.
Players can choose from a vast selection of pre-made skins available on specialized Minecraft skin websites. These websites offer a diverse range of skins designed by talented artists and community members, catering to different themes, characters, and styles. By browsing through these websites, players can easily find a skin that resonates with their personality and preferences.


