
In the vast and imaginative universe of Minecraft, players have the opportunity to collaborate, explore, and build in a shared world. One of the most engaging ways to do this is by connecting to a Local Area Network (LAN) server. This allows you to venture into the virtual realm alongside your friends or family members in close proximity, providing an unparalleled multiplayer experience. Whether you’re new to the game or a seasoned miner, learning how to join a LAN server can unlock a realm of endless creativity and cooperation.
Minecraft, with its limitless potential for construction and exploration, comes alive when experienced with others. A LAN server is a localized network that enables players within the same physical vicinity to connect and play together without the need for an external server or an active internet connection. This is particularly advantageous for gatherings, LAN parties, or home setups where multiple players wish to collaborate on grand projects, embark on daring adventures, or simply enjoy each other’s company within the game’s pixelated landscapes.
In this guide, we will delve into the fundamentals of joining a LAN server on Minecraft. We’ll walk you through the necessary steps, from ensuring your devices are properly connected to troubleshooting common issues that might arise during the process. We understand that technology can sometimes appear daunting, but fear not – with a bit of guidance, you’ll be crafting, mining, and exploring alongside your peers in no time.
Before you dive into the world of LAN servers, it’s essential to understand the prerequisites and potential challenges that might arise. We’ll discuss the hardware and software requirements, ensuring that your devices are set up to communicate seamlessly. Moreover, we’ll shed light on firewall configurations and security settings that might influence your ability to connect.
Whether you’re planning an epic build with friends or seeking thrilling adventures in the Minecraft universe, joining a LAN server can transform your gameplay experience. As we proceed through this guide, you’ll uncover the steps required to establish connections, troubleshoot any hindrances, and embark on a collaborative journey that showcases the true essence of Minecraft’s multiplayer magic.
What Need to Join a LAN Server on Minecraft?
To join a LAN server on Minecraft, you’ll need a few essential components and follow specific steps to ensure a seamless connection. Here’s a breakdown of what you’ll need:
- Devices and Network Setup:
- Computers/Devices: You’ll need computers or devices (such as laptops, desktops, tablets, or consoles) that have Minecraft installed and are connected to the same Local Area Network (LAN).
- Network Connection: All devices should be connected to the same Wi-Fi network or connected through Ethernet cables to the same router or switch.
- Minecraft Version:
- Make sure that all players are using the same version of Minecraft. Mismatched versions can cause compatibility issues and prevent players from connecting to the LAN server.
- Game Mode:
- Ensure that all players are set to the same game mode (Survival, Creative, Adventure, or Spectator) before joining the LAN server.
- Host’s World:
- The player who wants to host the LAN server should have a world created or loaded in Minecraft. This will be the world that other players will join.
- Firewall and Security Settings:
- Disable any firewalls or security software that might block the Minecraft connection. If you’re having trouble connecting, check your firewall settings to make sure Minecraft is allowed through.
- Joining Process:
- Once all the devices are connected to the same network and the host’s world is ready, launch Minecraft on each device.
- Multiplayer Settings:
- From the main menu, click on “Play” and select the world you want to play in. Then, navigate to the “Settings” (or “Edit”) button for the selected world.
- Open to LAN:
- Within the world settings, there should be an option to “Open to LAN.” Click on this option to enable LAN multiplayer for that world.
- Wait for Players:
- Once the world is open to LAN, other players on the same network should be able to see the host’s game in their multiplayer server list.
- Join the Server:
- Other players can now join the LAN server by selecting the host’s game from the multiplayer server list. Click on the server to connect.
- Interaction and Gameplay:
- Players who successfully join the LAN server will now be able to interact, build, and play together within the same world.
- Troubleshooting:
- If players are unable to see the LAN server or encounter connectivity issues, check the firewall settings, ensure devices are on the same network, and verify that everyone is using the same Minecraft version.
Remember, the LAN server setup is designed for playing with others on a local network. If you want to play with friends who are not in the same physical location, you would need to set up a dedicated server or use an external Minecraft server hosting service.
What is the Best Server on Minecraft?
Determining the “best” server in Minecraft can be subjective, as it heavily depends on your preferences and what you’re looking for in a server. Minecraft offers a wide variety of servers, each catering to different gameplay styles and interests. Here are a few popular types of Minecraft servers:
- Survival Servers:
- These servers focus on the core survival aspects of Minecraft. Players gather resources, build shelters, and survive against monsters and challenges.
- Creative Servers:
- Creative servers provide players with unlimited resources, allowing them to build without limitations. These servers are perfect for players who enjoy designing and constructing elaborate structures.
- Minigame Servers:
- Minigame servers offer a range of mini-games within Minecraft, such as parkour, PvP battles, racing, and more. These servers are great for quick and competitive gameplay.
- Roleplay Servers:
- Roleplay servers encourage players to immerse themselves in a fictional world, adopting roles and creating stories within the Minecraft universe.
- Economy Servers:
- Economy servers introduce virtual economies where players can buy, sell, and trade items. These servers often feature player-owned shops and in-game currency systems.
- Modded Servers:
- Modded servers use mod packs to introduce new gameplay mechanics, items, and features to Minecraft. These servers can drastically change the way the game is played.
- PvP Servers:
- PvP (Player vs. Player) servers focus on combat and competition between players. They can include various game modes like faction wars, capture the flag, and more.
- Hardcore Servers:
- Hardcore servers raise the stakes by increasing the difficulty. In these servers, death is often permanent, adding a challenging aspect to the gameplay.
- Adventure and Quest Servers:
- Adventure servers offer custom quests, storylines, and challenges for players to complete. These servers provide a more structured and goal-oriented experience.
When looking for the best server, consider your gameplay preferences, whether you enjoy building, surviving, battling, roleplaying, or exploring. Additionally, take into account factors like server population (how many players are active), server stability, community rules, and the presence of active moderators.
To find a server that suits your preferences, you can use online server listing websites, Minecraft forums, or even join Minecraft-related communities on social media platforms. Keep in mind that the “best” server is the one that aligns with what you enjoy most in the game and provides an engaging and welcoming environment for you to interact with other players.
How You Can Change Your Minecraft Server?
Changing your Minecraft server involves selecting a new server to connect to within the Minecraft game client. Here’s how you can change your Minecraft server:
- Launch Minecraft: Open the Minecraft game on your device.
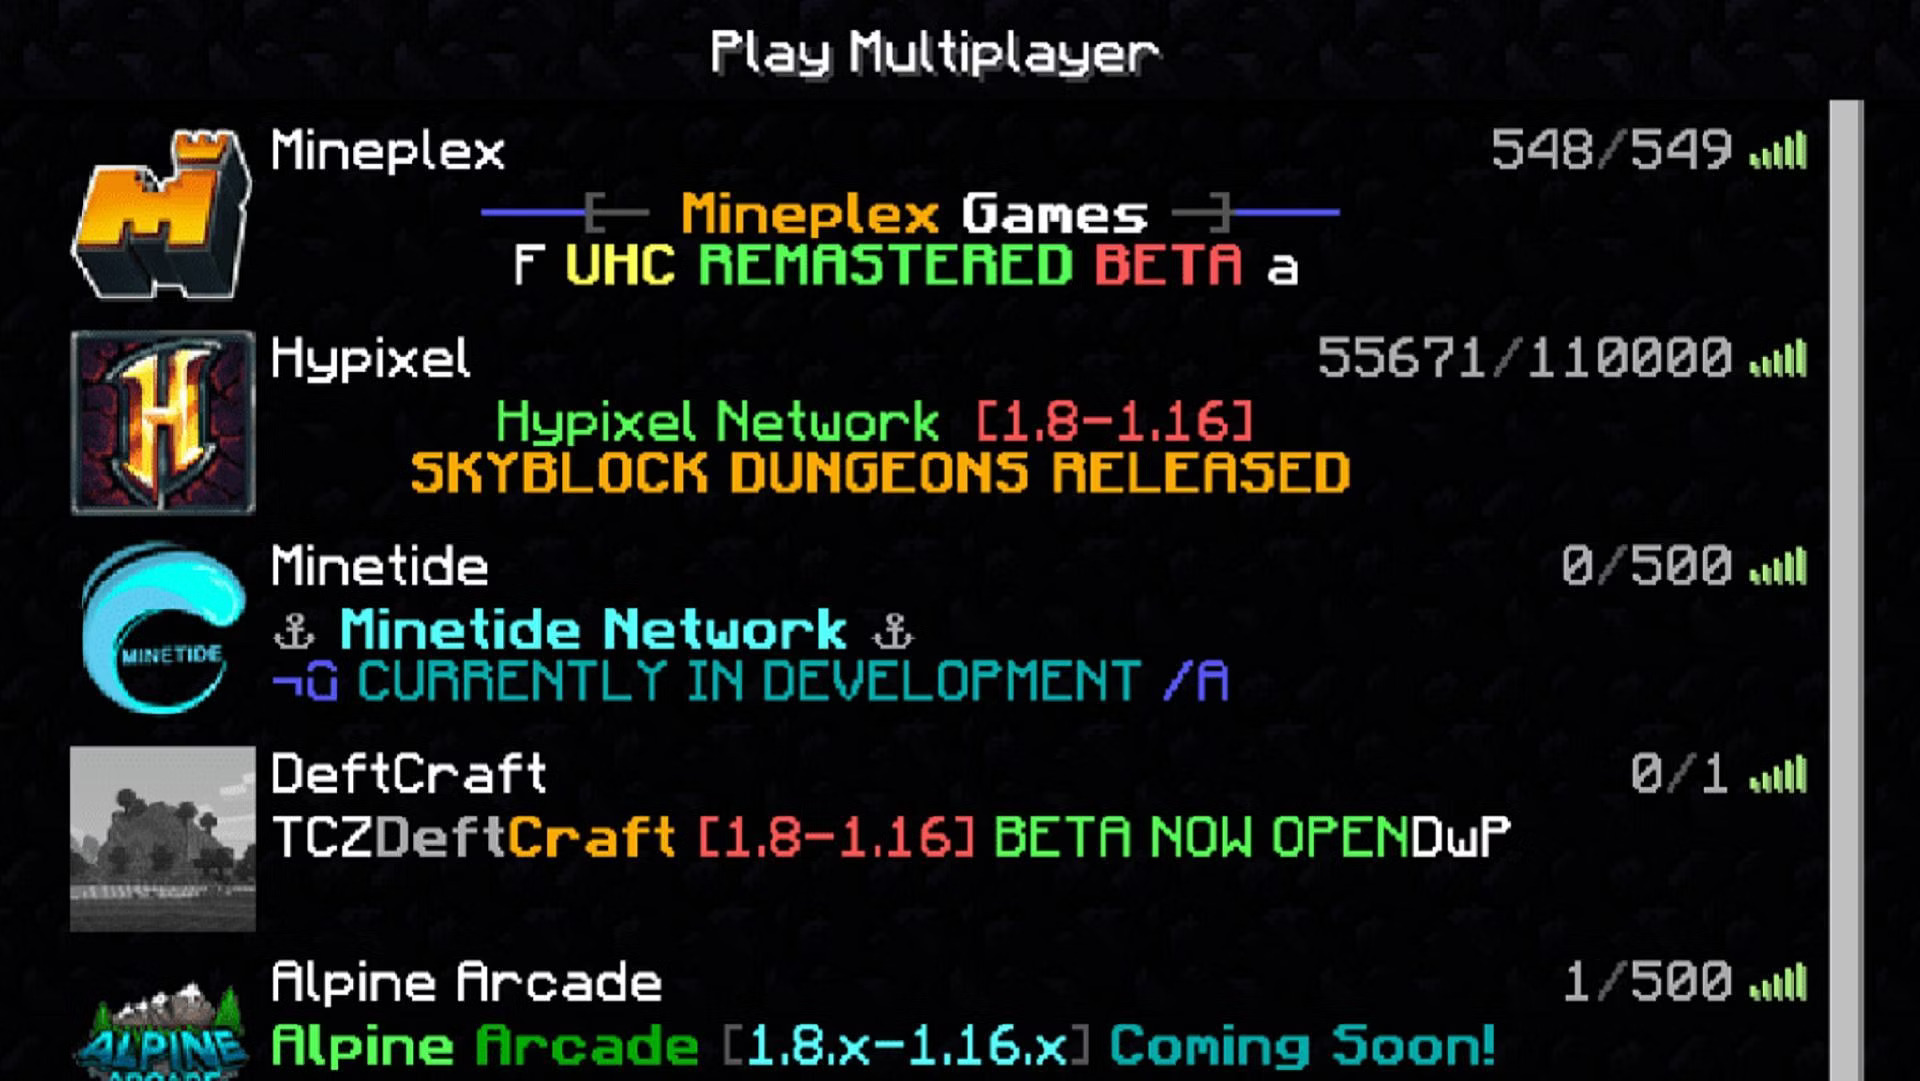
- Access the Multiplayer Menu: From the main menu, click on the “Multiplayer” option. This will take you to the multiplayer server list.
- View Current Servers: In the multiplayer server list, you’ll see a list of servers you’ve previously connected to. These servers might include ones you’ve added manually or those you’ve connected to automatically.
- Add a New Server: To change to a new server, you can either:
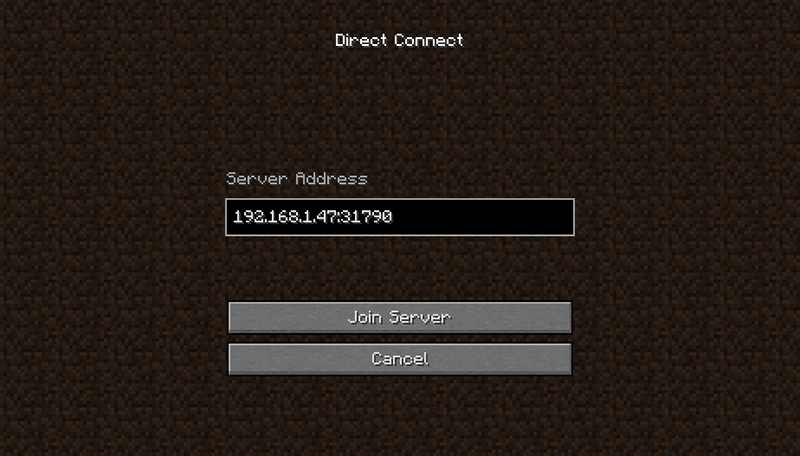
- Add Server Manually: If you want to connect to a server not on your list, click the “Add Server” button. Here, you can enter the server’s IP address and port number.
- Select from List: If you’ve previously connected to the server you want to switch to, simply click on its name in the list.
- Enter Server Information: If you’re adding a server manually, you’ll need to enter the server’s IP address and port. You can also give the server a name to make it easier to identify later.
- Connect to the New Server: Once you’ve added the server information, click the “Done” button or the “Connect” button (depending on your Minecraft version). This will attempt to connect you to the new server.
- Wait for Connection: Minecraft will attempt to connect to the new server. If the server is online and you’ve entered the correct information, you should see the server’s status change to “Pinging…” and then show the number of players online if it successfully connects.
- Enter Server: If the connection is successful, you’ll be able to click on the server in the list to enter it. If prompted, you might need to enter a username or password if the server has authentication enabled.
- Explore the New Server: After connecting, you’ll be inside the new server’s world. You can explore, interact with other players, and enjoy the gameplay the server offers.
Remember that server availability can change, and some servers might have specific rules, restrictions, or modifications that could affect your experience. Make sure to read any server information or guidelines provided by the server administrators.
Additionally, if you’re playing on a LAN server or a server you’re hosting, the process might differ slightly. For LAN servers, you’ll need to be connected to the same local network as the server host. For servers you’re hosting, you’ll need to manage server files and configurations, which can involve more advanced steps.
Conclusion!
In conclusion, joining a LAN world in Minecraft opens the door to a world of shared adventures, creativity, and camaraderie with friends and family. By following a few straightforward steps, you can seamlessly connect to a Local Area Network (LAN) server and dive into the immersive blocky universe together. Begin by ensuring that all participating devices are connected to the same local network, either through Wi-Fi or Ethernet cables. Having a stable connection lays the foundation for a smooth multiplayer experience. Next, make sure that all players are using the same version of Minecraft to avoid compatibility issues. Keeping everyone on the same page ensures that everyone can fully enjoy the adventure. The player who intends to host the LAN world should have a pre-existing world or a new one ready to explore. This world will serve as the shared canvas for all players to interact within.


