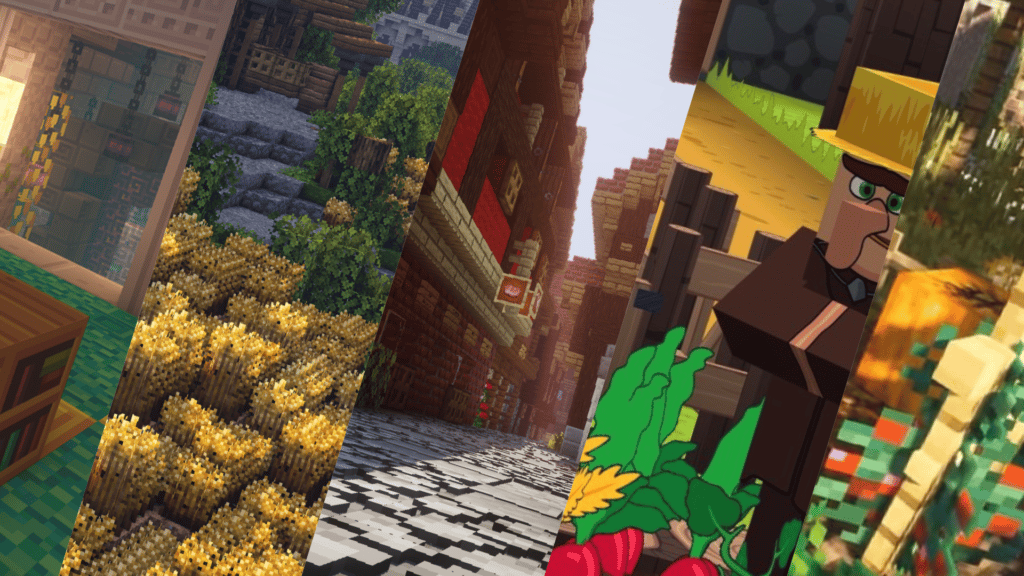
Minecraft, the beloved sandbox game by Mojang Studios, offers players a captivating world of endless possibilities. With its iconic pixelated aesthetic, Minecraft provides a blank canvas for players to create and shape their own virtual realms. One of the key elements that allows players to personalize their Minecraft experience is the ability to customize the game’s textures through texture packs.
A Minecraft texture pack allows you to modify the game’s visuals, transforming everything from blocks and items to landscapes and creatures. By crafting your own texture pack, you can breathe life into Minecraft’s virtual universe, infusing it with your unique artistic style and imagination. This guide will walk you through the process of creating a custom Minecraft texture pack, empowering you to manifest your creative vision and share it with others.
In this journey of creation, we will explore the fundamental steps, tools, and considerations needed to produce a well-crafted texture pack. You will learn how to choose a theme or style, gather inspiration, and plan your designs. We’ll delve into the intricacies of editing textures, providing insights into popular image editing software and techniques used by texture pack creators. Along the way, we’ll discuss optimization, ensuring your pack remains compatible with different Minecraft versions and performs efficiently.
Additionally, we’ll explore the legal and ethical aspects of texture pack creation, highlighting the importance of respecting intellectual property rights and understanding the community’s guidelines for sharing and distributing texture packs. Finally, we’ll touch upon ways to showcase and distribute your texture pack, allowing your creation to reach a wider audience and potentially become a cherished addition to the Minecraft modding community.
Get ready to embark on a creative adventure, where you’ll uncover the secrets of Minecraft texture pack creation and transform the game’s visuals into a manifestation of your artistic prowess. So grab your digital brush and let’s embark on this journey to craft a Minecraft texture pack that’s truly your own!
How Does a Texture Pack Work

A texture pack, also known as a resource pack, is a collection of files that alter the visual appearance of Minecraft. It replaces the default textures used for blocks, items, mobs, and other in-game elements with custom-designed textures. A texture pack allows players to modify the game’s aesthetics, giving it a unique and personalized look.
When Minecraft loads, it checks for the presence of a texture pack in a specific folder. By selecting and activating a texture pack, the game engine replaces the default textures with the ones provided in the pack. This process happens in real-time, ensuring that the modified textures are displayed while playing the game.
Here’s an overview of how a texture pack works:
- File Structure: A texture pack is organized in a specific file structure. It typically includes a folder containing all the customized textures and additional files for features like sound, language localization, and custom models (if applicable).
- Texture Files: The core component of a texture pack is the texture files. These files are created using image editing software such as Photoshop or GIMP. Each texture file corresponds to a specific in-game element, such as a block, item, or mob. The textures are saved in a supported image format, such as PNG, and have specific dimensions.
- Naming Conventions: To ensure that the game recognizes and applies the custom textures correctly, the texture files must adhere to specific naming conventions. The file names match the default textures they are replacing. For example, if you want to change the texture of a dirt block, you would create a texture file named “dirt.png.”
- Activating the Texture Pack: To use a texture pack, players need to place the pack’s folder in the “resourcepacks” directory of their Minecraft installation. They can then select the desired texture pack from the game’s options menu, activating it for their gameplay session.
- Compatibility and Updates: Minecraft periodically receives updates that may introduce new blocks, items, or changes to existing textures. Texture pack creators need to update their packs to ensure compatibility with the latest version of the game. This involves reviewing and modifying their custom textures to match any changes made in the game.
By utilizing a texture pack, Minecraft players can completely transform the visual atmosphere of the game. Whether it’s creating a realistic world, a vibrant cartoon-style environment, or a themed adventure, texture packs offer endless possibilities for customization, enhancing the player’s immersion and visual enjoyment of the Minecraft experience.
Manually Make Texture Pack for Java Edition

Creating a texture pack for Minecraft Java Edition involves a series of steps that require basic image editing skills and a bit of creativity. Here’s a manual approach to making a texture pack:
- Prepare a Working Folder:
- Create a new folder on your computer to serve as the working directory for your texture pack.
- Understand the Default Textures:
- Familiarize yourself with Minecraft’s default textures by exploring the game’s resource files. You can find these files in the Minecraft installation directory under the “assets” folder.
- Choose a Theme or Style:
- Decide on the theme or style you want your texture pack to have. It could be anything from realistic to cartoonish, medieval to futuristic. Having a clear vision will guide your design process.
- Create Custom Textures:
- Use an image editing software like Photoshop, GIMP, or Paint.NET to design your textures. Create individual image files for each texture you want to modify.
- Ensure your custom textures match the dimensions of the original textures. For most blocks, the standard resolution is 16×16 pixels, but you can create higher-resolution textures if desired.
- Maintain the same file names as the default textures for easy replacement.
- Edit Textures:
- Modify the individual textures to align with your chosen theme. This could involve changing colors, adding details, or creating entirely new designs.
- Experiment with different brushes, filters, and layering techniques to achieve your desired visual style.
- Optimize and Finalize:
- Review your custom textures to ensure they look consistent and visually appealing together. Maintain a cohesive style throughout the pack.
- Optimize your textures for file size by reducing unnecessary details or using appropriate compression without sacrificing quality.
- Create a Texture Pack Structure:
- In your working folder, create a new folder and name it “assets.” Within the “assets” folder, create subfolders for the different elements you’ve modified, such as “textures/blocks” for block textures.
- Place your custom texture files in their respective subfolders, maintaining the same folder structure as the default Minecraft textures.
- Create a Pack.mcmeta File:
- In your working folder, create a new text document and name it “pack.mcmeta.” This file contains metadata information about your texture pack.
- Use a text editor to enter the following content into the “pack.mcmeta” file:
{

"pack": {

"pack_format": 7,

"description": "Your texture pack description"

}

}
- Replace “Your texture pack description” with a brief summary or title for your texture pack.
- Compress the Texture Pack:
- Select all the files and folders in your working folder, right-click, and choose “Compress” or “Send to” to create a compressed archive file (e.g., ZIP file) of your texture pack.
- Test and Share:
- Copy the compressed texture pack file to the “resourcepacks” folder of your Minecraft Java Edition installation directory.
- Launch Minecraft, go to the resource pack section in the game’s options, and select your texture pack.
- Start a new game or load an existing world to see your custom textures in action.
- Share your texture pack with others by distributing the compressed texture pack file.
Remember to respect intellectual property rights and not use copyrighted materials in your texture pack. Creating your own original textures or seeking permission from the creators of existing texture packs is important to maintain ethical standards.
With these steps, you can manually create a texture pack for Minecraft Java Edition, allowing you to customize the game’s visuals and express your unique artistic vision within the Minecraft universe.
Extract Minecraft Texture Files
To extract Minecraft texture files, you’ll need access to the game’s resource files. Here’s a step-by-step guide on how to extract Minecraft texture files:
- Locate the Minecraft Installation Directory:
- Open your file explorer and navigate to the installation directory of Minecraft Java Edition. The default directory paths for common operating systems are as follows:
- Windows:
%appdata%\.minecraft - macOS:
~/Library/Application Support/minecraft - Linux:
~/.minecraft
- Windows:
- Open your file explorer and navigate to the installation directory of Minecraft Java Edition. The default directory paths for common operating systems are as follows:
- Access the Resource Pack Folder:
- Within the Minecraft installation directory, locate the “resourcepacks” folder. This folder contains any installed resource packs but also serves as a storage location for the default Minecraft textures.
- Create a Working Folder:
- Create a new folder on your computer’s desktop or in another easily accessible location. This folder will serve as your working directory for the extracted texture files.
- Copy the Minecraft Resource Pack:
- In the “resourcepacks” folder, locate the default resource pack that Minecraft uses. The default resource pack is usually named “Default” or “Minecraft.”
- Copy the entire default resource pack folder and paste it into your working folder.
- Extract the Texture Files:
- Open the copied default resource pack folder in your working folder.
- Inside the resource pack folder, you will find a subfolder named “assets.” Open this folder.
- Within the “assets” folder, you will find various subfolders containing the different textures used in Minecraft, such as “minecraft,” “textures,” “blocks,” etc.
- Navigate through these folders to find the specific texture files you want to extract.
- Copy the Texture Files:
- Select the texture files you want to extract from the default resource pack.
- Copy the selected files and paste them into a separate folder within your working directory. You can create new subfolders within your working folder to organize the extracted textures if desired.
- Repeat for Other Texture Categories (Optional):
- If you want to extract textures from other categories (e.g., items, mobs, environment), navigate through the corresponding folders in the “assets” folder of the default resource pack and repeat the process of copying and pasting the desired texture files into your working folder.
- Utilize the Extracted Texture Files:
- With the texture files extracted, you can use them as a base for creating your custom texture pack or modify them further using image editing software.
- Remember to respect the terms of use and licensing agreements associated with the extracted texture files.
By following these steps, you can extract the default Minecraft texture files, providing you with a starting point for creating your own custom texture pack or for reference in understanding the structure and design of Minecraft’s default textures.
Conclusion!
In conclusion, creating a Minecraft texture pack allows you to personalize the visual experience of the game and unleash your creative vision. By manually crafting your own texture pack, you can transform Minecraft’s default textures into unique designs that align with your preferred theme or style. Through image editing software, you can modify and create custom textures for blocks, items, mobs, and more, ensuring a cohesive and visually appealing aesthetic throughout your pack.


