
With its endless possibilities and immersive gameplay, Minecraft has captured the hearts of millions of players worldwide. While exploring the vast worlds created by others can be enthralling, setting up your very own Minecraft server can provide an entirely new level of excitement and control. Whether you want to create a private realm for friends or build a thriving community, establishing a Minecraft server is a fulfilling endeavor.
In this guide, we will walk you through the process of setting up your own Minecraft server, from gathering the necessary requirements to configuring and launching the server successfully. While the task might seem daunting at first, with the right approach and a bit of technical knowledge, you can create a server that caters to your unique vision.
To begin, there are a few key elements you’ll need to consider. First and foremost, you’ll require a suitable hardware setup. A dedicated machine with sufficient RAM and processing power is essential to ensure smooth gameplay and accommodate multiple players simultaneously. Next, you’ll need to obtain the Minecraft server software, which can be easily downloaded from the official Minecraft website.
Once you have the necessary hardware and software, the setup process can be divided into several steps. These include configuring network settings, installing Java, and customizing server properties to suit your preferences. Additionally, we will guide you through port forwarding, which allows other players to connect to your server from outside your local network.
Furthermore, we’ll discuss the importance of server security and offer tips on protecting your server from unauthorized access or griefing. We will cover techniques such as enabling whitelisting, setting up administrative permissions, and implementing regular backups to safeguard your progress.
By the end of this guide, you will have the knowledge and tools required to embark on your Minecraft server journey. You’ll be able to create a unique online environment for yourself and others, where creativity flourishes and adventures unfold. So let’s dive in and unlock the limitless possibilities that await you in the world of Minecraft server hosting!
How to Make a Minecraft Server with Hostinger, Ubuntu, Windows, and macOS
Setting up a Minecraft server can be accomplished using various hosting platforms and operating systems. In this guide, we will focus on using Hostinger as the hosting provider and walk you through the steps for setting up a Minecraft server on Ubuntu, Windows, and macOS.
- Choosing Hostinger :
- Visit the Hostinger website (hostinger.com) and sign up for an account.
- Choose a hosting plan that suits your needs and budget.
- Setting up the Server on Ubuntu :
- Access your Hostinger control panel and navigate to the “Minecraft” section.
- Click on “Manage” to access the server management interface.
- Select the “Ubuntu” option and choose your desired server location.
- Click “Start” to initialize the server installation.
- Wait for the installation process to complete.
- Setting up the Server on Windows :
- Access your Hostinger control panel and navigate to the “Minecraft” section.
- Click on “Manage” to access the server management interface.
- Select the “Windows” option and choose your desired server location.
- Click “Start” to initialize the server installation.
- Wait for the installation process to complete.
- Setting up the Server on macOS:
- Access your Hostinger control panel and navigate to the “Minecraft” section.
- Click on “Manage” to access the server management interface.
- Select the “macOS” option and choose your desired server location.
- Click “Start” to initialize the server installation.
- Wait for the installation process to complete.
- Configuring the Minecraft Server :
- Once the installation is complete, you’ll receive the server IP address and login details.
- Use a secure shell (SSH) client like PuTTY (Windows) or Terminal (macOS) to connect to your server.
- Install Java on your server if it’s not already installed.
- Download the Minecraft server software from the official Minecraft website (minecraft.net).
- Transfer the server software to your server using SCP or SFTP.
- Run the server software using the appropriate command for your operating system.
- Customizing the Server :
- Access the server.properties file to modify server settings, such as game mode, difficulty, and world options.
- Install plugins or mods to enhance gameplay and add additional features.
- Configure server permissions and whitelist players if desired.
- Accessing and Managing the Server :
- Share the server IP address with your friends or community members.
- Connect to the server using the Minecraft Java Edition client.
- Use the server management interface provided by Hostinger to monitor and manage your server, including starting, stopping, and restarting.
Remember to regularly back up your server files to prevent data loss and consider implementing security measures like strong passwords and regular software updates.
Setting up a Minecraft server with Hostinger on Ubuntu, Windows, or macOS allows you to create a dynamic multiplayer environment where you and your friends can embark on exciting adventures together. Enjoy the limitless creativity and endless possibilities that Minecraft offers!
How to Easily Configure a Hostinger Minecraft Plan
Configuring a Hostinger Minecraft plan is a straightforward process. Here’s a step-by-step guide to help you easily configure your Hostinger Minecraft plan :
- Sign in to your Hostinger account :
- Visit the Hostinger website (hostinger.com) and log in using your credentials.
- Access the Minecraft section :
- After logging in, navigate to your Hostinger dashboard or control panel.
- Choose the Minecraft plan :
- In the control panel, locate the “Minecraft” section and click on it.
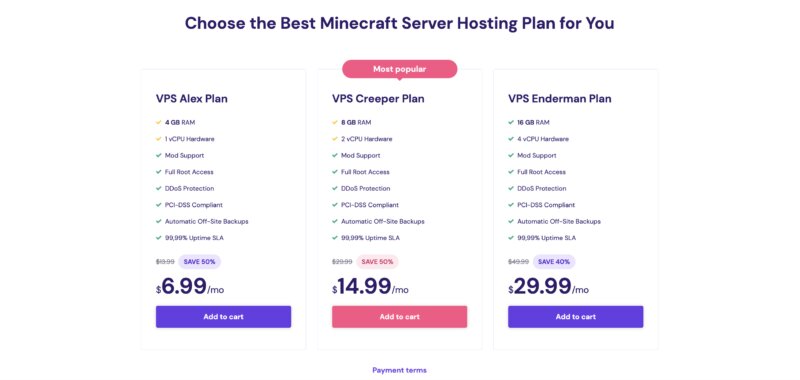
- Browse through the available Minecraft plans and select the one that suits your needs and budget.
- Consider factors such as server performance, allocated resources, and number of players.
- Select server location :
- Once you have chosen a Minecraft plan, you will be prompted to select a server location.
- Choose a location closest to your target audience or where you anticipate the majority of your players will be located.
- Keep in mind that server location affects latency and overall gameplay experience for your players.
- Customize plan settings :
- After selecting the server location, you may have the option to customize your Minecraft plan.
- This may include selecting the server type (Ubuntu, Windows, or macOS), amount of RAM, storage capacity, and other additional features.
- Review your requirements and adjust the settings accordingly.
- Configure billing and payment :
- Proceed to the billing and payment section to provide the necessary information.
- Choose your billing cycle (monthly, yearly, etc.) and enter your payment details.
- Verify all the details and confirm your purchase.
- Wait for setup completion :
- Once the configuration and payment process is complete, Hostinger will begin setting up your Minecraft plan.
- You will receive an email notification with the details of your Minecraft server, including the IP address and login credentials.
- Access and manage your Minecraft server :
- Use a secure shell (SSH) client like PuTTY (Windows) or Terminal (macOS) to connect to your server using the provided IP address and login credentials.
- Configure the Minecraft server according to your preferences, including game mode, difficulty, world settings, and any desired plugins or mods.
- Monitor and manage your server using the Hostinger control panel, which allows you to start, stop, and restart the server as needed.
By following these steps, you can easily configure your Hostinger Minecraft plan and begin creating your own Minecraft server for an immersive multiplayer experience. Enjoy exploring, building, and collaborating with your friends or community members in the world of Minecraft!
Setup Your Minecraft Server
To set up your own Minecraft server, follow these steps :
- Hardware and Software Requirements :
- Make sure you have a dedicated machine or virtual server with sufficient resources, including RAM, CPU, and storage space.
- Ensure that the server has a stable internet connection.
- Install the latest version of Java on the server machine.
- Download Minecraft Server Software :
- Visit the official Minecraft website (minecraft.net) and navigate to the “Download” section.
- Download the Minecraft server software (usually a JAR file) that corresponds to the Minecraft version you want to run.
- Configure Server Settings :
- Create a new folder on your server machine to store the Minecraft server files.
- Move the downloaded server software into this folder.
- Run the server software by executing the JAR file using the Java command. For example, on Windows, use the following command in the command prompt:
java -Xmx1024M -Xms1024M -jar minecraft_server.jar nogui
Adjust the values for memory allocation (-Xmx and -Xms) based on your server’s available resources.
- The first time you run the server, it generates essential configuration files.
- Accept Minecraft End User License Agreement (EULA) :
- Open the generated eula.txt file using a text editor.
- Change the line
eula=falsetoeula=trueaccept the Minecraft EULA. - Save the file and exit the text editor.
- Customize Server Settings :
- Open the server.properties file using a text editor.
- Modify various server settings according to your preferences, such as game mode, difficulty, world settings, and server name.
- Save the file and exit the text editor.
- Port Forwarding (If Hosting from Home) :
- Access your router’s configuration page by typing its IP address into a web browser.
- Locate the port forwarding settings.
- Forward TCP port 25565 to the internal IP address of the machine running the Minecraft server.
- Save the settings.
- Test and Launch the Server :
- Run the Minecraft server software again using the command from step 3.
- Wait for the server to start up.
- Once the server is up and running, you can connect to it using your Minecraft client by entering the server IP address.
- Server Administration and Security :
- To manage the server, you can use various commands and plugins. Familiarize yourself with server administration tools like the “/op” command for granting operator status to players and the “/ban” command for handling problematic users.
- Consider installing server security plugins and regularly backing up your server files to protect against unauthorized access and data loss.
Remember to review and adhere to Minecraft’s End User License Agreement and Terms of Service. Also, check for any additional guidelines or recommendations provided by the Minecraft community or hosting provider you choose.
Enjoy creating your Minecraft server and exploring the boundless possibilities it offers to you and your fellow players!
Conclusion!
Remember, there are various hosting providers and operating systems available, so you can choose the option that suits your needs best. Additionally, seeking support from online Minecraft communities and forums can be beneficial if you encounter any challenges along the way.
Now that you have the knowledge to set up your own Minecraft server, unleash your creativity, invite friends to join, and embark on exciting adventures in your very own virtual world. Have fun and enjoy the boundless possibilities that Minecraft server hosting provides!


