
Welcome to the enchanting world of Minecraft! Among the many incredible adventures and possibilities that await you, brewing stands offer an essential tool for crafting powerful potions. Whether you’re a seasoned player or just starting out, learning how to make a brewing stand is a crucial skill that will enhance your gameplay and allow you to delve deeper into the game’s intricate potion system.
In Minecraft, brewing stands serve as the focal point for concocting various potions with a wide range of effects. From healing and invisibility to strength and night vision, potions can significantly boost your abilities and provide unique advantages in combat, exploration, and other aspects of the game. By learning how to create a brewing stand, you’ll gain the ability to brew potions and open up a world of possibilities for your Minecraft character.
To craft a brewing stand, you’ll need a few essential ingredients and materials. One crucial item is the blaze rod, which you can obtain by defeating blazes in the Nether. Additionally, you’ll require three cobblestones, which are readily available and can be easily obtained in Minecraft. Cobblestones are a common resource found by mining stone with a pickaxe. By combining these elements in the correct pattern, you’ll be able to create your very own brewing stand.
Once you have successfully crafted your brewing stand, you can begin exploring the vast array of potions available in Minecraft. Potions can provide helpful effects like increased speed or allow you to tackle challenging encounters with more ease. As you progress, you can experiment with different combinations of ingredients to create unique potions with custom effects. By understanding the mechanics of brewing stands, you’ll gain a powerful tool to aid your adventures and become a master alchemist in the world of Minecraft.
Crafting a brewing stand in Minecraft is an essential step towards unlocking the game’s extensive potion system. With a brewing stand at your disposal, you’ll have the ability to create potions that enhance your abilities and provide strategic advantages in your Minecraft journey. So, gather your materials, embark on thrilling adventures, and become a skilled potion brewer in this captivating blocky universe.
How does a Brewing Stand work?
A brewing stand in Minecraft is a block used to brew potions. It operates based on a straightforward mechanism that involves fuel, ingredients, and water bottles. Here’s how a brewing stand works:
- Activation: To activate a brewing stand, you need to fuel it with Blaze Powder. Place the Blaze Powder in the fuel slot of the brewing stand interface. Once fueled, the brewing stand will become operational.
- Water Bottles: Fill the three glass bottle slots on the left side of the brewing stand interface with water bottles. These bottles serve as the base for brewing potions. You can obtain water bottles by using empty glass bottles on a water source block.
- Primary Ingredient: Place the primary ingredient in the top slot of the brewing stand. The primary ingredient is typically Nether Wart, which is required for brewing most potions. Each primary ingredient has its own effect, determining the base effect of the potion being brewed.
- Brewing Process: Once the water bottles and primary ingredient are in place, the brewing process begins. The Blaze Powder fuel activates the brewing stand, causing the water bottles to bubble. A progress bar appears, indicating the time remaining for the brewing process. The duration depends on the type of potion being brewed.
- Adding Modifiers (Optional): After the initial brewing process completes, you have the option to add additional ingredients to modify the potion’s effects. Some modifiers include Redstone Dust, which increases the duration, Glowstone Dust, which increases the potency, and Fermented Spider Eye, which alters the effect of the potion.
- Collecting the Potion: Once the brewing process is finished, the resulting potion appears in the top right slot of the brewing stand interface. Left-click or drag the potion into your inventory to collect it.
- Further Customization: You can combine potions with the same base effects in a crafting table to create more advanced potions. Additionally, you can transform potions into splash potions or lingering potions by using certain ingredients like Dragon’s Breath or Gunpowder.
That’s the basic functionality of a brewing stand in Minecraft. By following this process and experimenting with different ingredients, you can create a wide variety of potions to enhance your gameplay, provide strategic advantages, and aid in your Minecraft adventures.
What Can You Do With a Brewing Stand?
With a brewing stand in Minecraft, you can engage in a variety of activities and create potions with various effects. Here are some of the things you can do with a brewing stand:
- Brew Potions: The primary function of a brewing stand is to brew potions. By combining water bottles, various ingredients, and Blaze Powder as fuel, you can create potions with different effects. These effects can include healing, invisibility, strength, night vision, speed, and many more. Potions can be extremely useful for enhancing your abilities, surviving tough battles, exploring dark areas, or even making creative builds.
- Extend Potion Durations: Brewing stands allow you to extend the duration of certain potions. By using certain ingredients like Redstone Dust, you can increase the duration of potions, making their effects last longer. This is particularly useful when you want to maximize the benefits of a particular potion during your Minecraft adventures.
- Create Splash Potions: With a brewing stand, you can also create splash potions. Splash potions are throwable potions that, upon impact, affect a certain area or multiple entities within the splash radius. This can be helpful in group combat situations or when you want to apply a potion’s effects to multiple players or mobs simultaneously.
- Enhance Enchanting: Brewing stands are also crucial for enhancing your enchanting abilities. Certain potions, such as the Potion of Weakness or Potion of Night Vision, can be used in combination with an enchanting table to unlock additional enchantments or improve your chances of obtaining desirable enchantments on your tools, weapons, and armor.
- Create Lingering Potions: Lingering potions are similar to splash potions but create an area of effect cloud that lingers for a certain duration. With a brewing stand, you can brew lingering potions by using Dragon’s Breath, which is obtained from the Ender Dragon, or by converting splash potions into lingering potions using Dragon’s Breath. Lingering potions can be strategically used for area denial or affecting multiple entities over time.
- Customize Potions: Brewing stands allow you to experiment and customize potions according to your needs. By combining different ingredients, you can create unique and custom potions with specific effects or combinations of effects. This flexibility enables you to tailor potions to suit your playstyle and specific goals within the game.
In summary, a brewing stand opens up a world of possibilities in Minecraft by providing the means to brew potions, extend their duration, create splash and lingering potions, enhance enchanting, and customize potions to suit your gameplay preferences. It’s an essential tool for those looking to delve into the intricacies of potion brewing and gain a competitive edge in various aspects of the game.
How to Craft a Brewing Stand in Minecraft

To craft a brewing stand in Minecraft, follow these simple steps:
Step 1: Gather the necessary materials Before you can create a brewing stand, you’ll need the following materials:
- 1 Blaze Rod: You can obtain a blaze rod by defeating blazes, which are hostile mobs found in Nether Fortresses.
- 3 Cobblestones: Cobblestones are a common resource that can be obtained by mining stone with a pickaxe.
Step 2: Open the crafting table Open your crafting table. This can be done by right-clicking on the table.
Step 3: Arrange the materials In the 3×3 crafting grid of the crafting table, place the materials in the following pattern:
- Place the blaze rod in the middle box of the first row.
- Fill the second row completely with cobblestones.
Step 4: Retrieve the brewing stand Once you have arranged the materials correctly, the brewing stand will appear in the result box of the crafting table.
Step 5: Take the brewing stand Click on the brewing stand in the result box, and it will be transferred to your inventory.
Congratulations! You have successfully crafted a brewing stand in Minecraft. You can now place the brewing stand in your desired location and begin experimenting with potions by combining various ingredients and water bottles. Remember to fuel the brewing stand with Blaze Powder to activate it and start the brewing process. Enjoy the fascinating world of potions and their magical effects in your Minecraft adventures!
How to Brew Potions in Minecraft
Brewing potions in Minecraft involves a series of steps and requires a brewing stand, water bottles, ingredients, and Blaze Powder for fuel. Here’s a step-by-step guide on how to brew potions:
Step 1: Craft or acquire a brewing stand If you haven’t already, follow the steps mentioned earlier to craft a brewing stand. Alternatively, you may find brewing stands in certain generated structures such as witch huts or igloos.
Step 2: Gather ingredients and water bottles To brew potions, you’ll need various ingredients depending on the type of potion you want to create. Some common ingredients include Nether Wart, Blaze Powder, Ghast Tears, Sugar, Spider Eyes, and more. Additionally, you’ll need glass bottles filled with water. You can obtain water bottles by right-clicking on a water source block with empty glass bottles.
Step 3: Fill the brewing stand with water bottles Place the brewing stand on the ground and right-click on it to open its interface. There will be three slots for water bottles on the left side of the brewing stand. Fill these slots with the water bottles you collected.
Step 4: Add ingredients to the brewing stand In the top slot of the brewing stand, place the primary ingredient for the desired potion. For example, if you want to create a Potion of Healing, add a Nether Wart. The ingredient’s effect determines the base effect of the potion.
Step 5: Wait for the brewing process Once you’ve added the ingredient, the brewing process will begin. You’ll see the water bottles in the bottom slots start bubbling and a progress bar indicating the time remaining for brewing. The time it takes depends on the potion being brewed.
Step 6: Add modifiers (optional) If you want to enhance or modify the potion’s effect, you can add additional ingredients to the brewing stand once the base potion is brewed. These ingredients include items like Redstone Dust to increase duration, Glowstone Dust to increase potency, or Fermented Spider Eye to change the potion’s effect.
Step 7: Collect the finished potion Once the brewing process is complete, the resulting potion will appear in the top right slot of the brewing stand. You can then move it to your inventory by left-clicking or dragging it.
Step 8: Enjoy and utilize your potions With the finished potion in your inventory, you can now consume it, store it for later use, turn it into splash or lingering potions, or combine it with other potions using the crafting table to create more advanced potions.
By following these steps and experimenting with different ingredients, you can brew a wide variety of potions in Minecraft, each with its unique effects and uses. Have fun exploring the world of alchemy and discovering the benefits potions bring to your Minecraft adventures!
What can you make in a Brewing Stand?
In a brewing stand, you can create a variety of potions with different effects and durations. Here are some examples of potions you can make using a brewing stand in Minecraft:
- Healing Potion: Made with a Nether Wart as the primary ingredient, a Healing Potion restores health when consumed.
- Strength Potion: Brewed with Blaze Powder and Blaze Powder as the modifier, a Strength Potion enhances your melee attacks, making them more powerful.
- Invisibility Potion: By using a Fermented Spider Eye as a modifier, you can create an Invisibility Potion that renders you invisible to other players and mobs.
- Night Vision Potion: Brewing a Golden Carrot as a modifier with a Nether Wart results in a Night Vision Potion, granting you the ability to see clearly in the dark.
- Fire Resistance Potion: Made with a Magma Cream as the modifier, a Fire Resistance Potion provides immunity to fire and lava, allowing you to traverse hazardous environments.
- Swiftness Potion: Brewing Sugar as a modifier with a Nether Wart produces a Swiftness Potion that increases your movement speed for a duration.
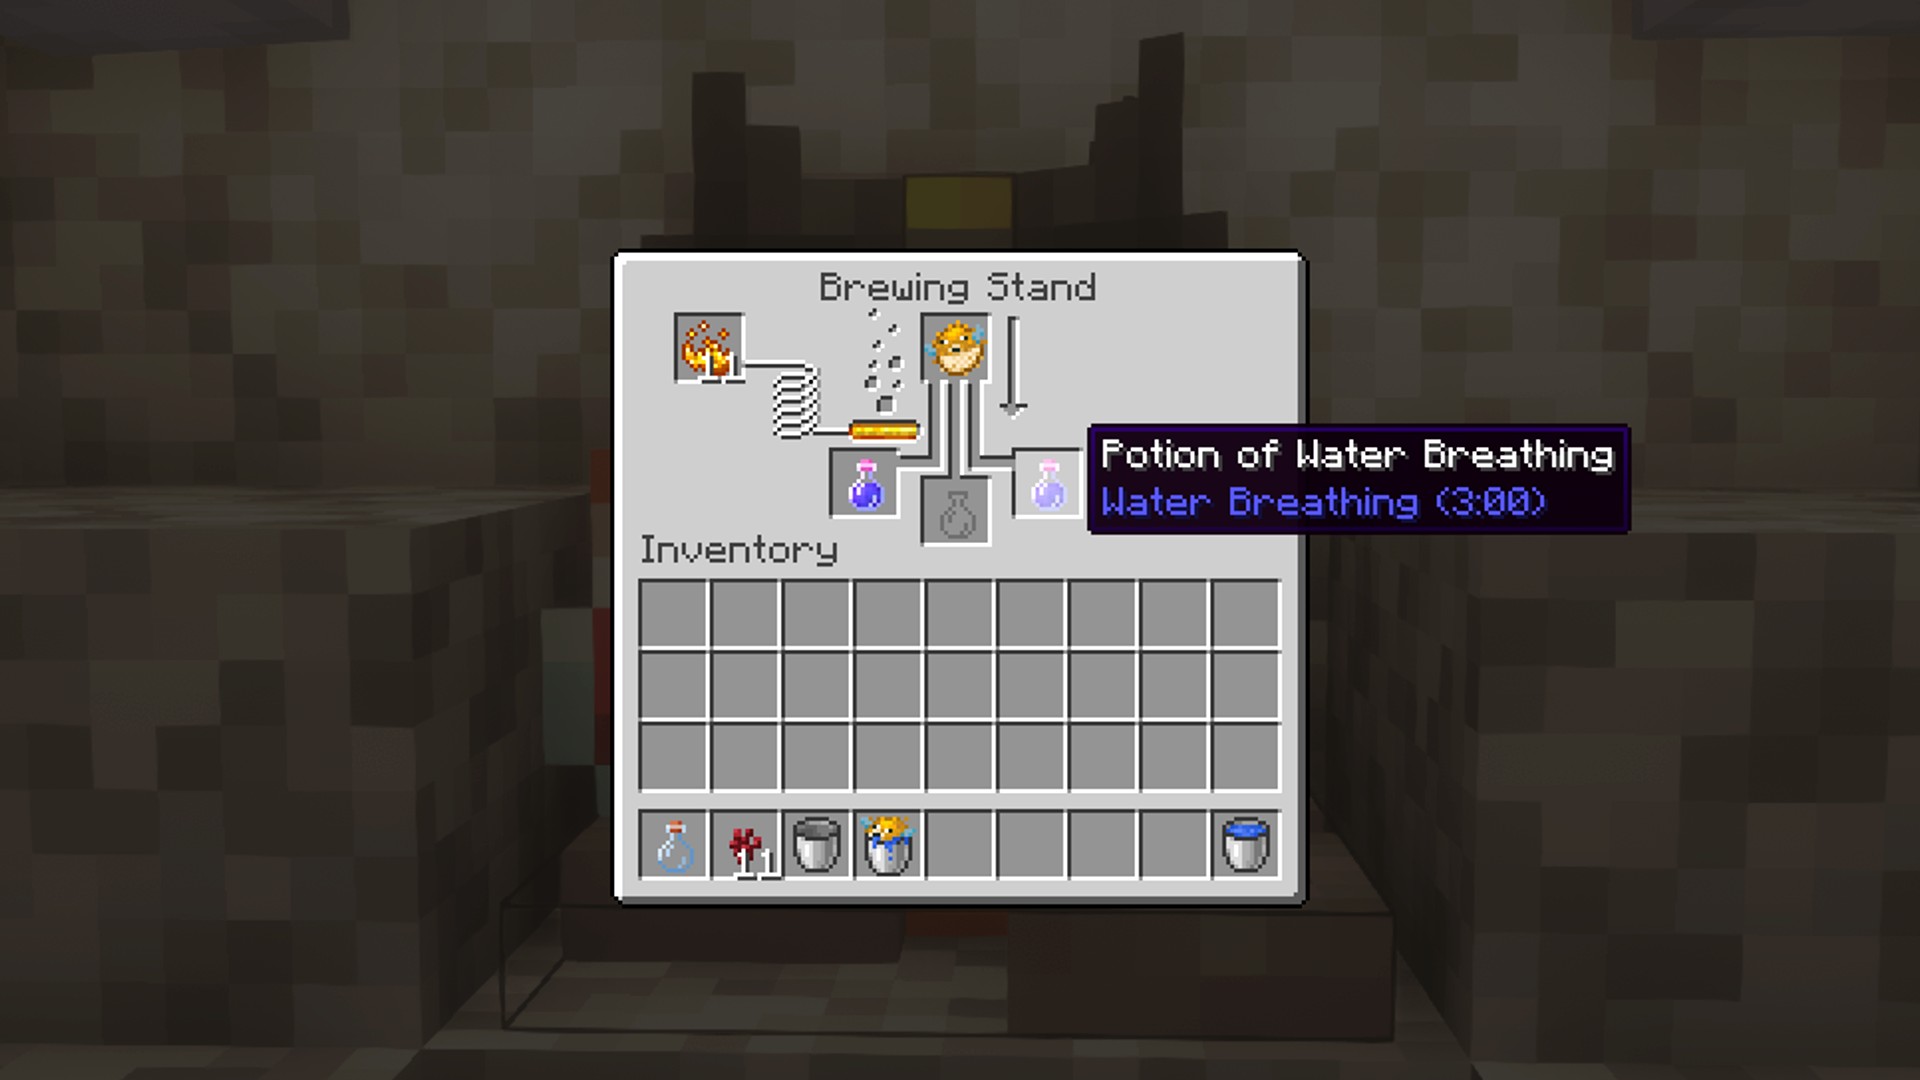
- Water Breathing Potion: By using a Pufferfish as the modifier, you can brew a Water Breathing Potion, enabling you to breathe underwater without any time limit.
- Potion of Regeneration: Brewing Ghast Tears as a modifier with a Nether Wart results in a Potion of Regeneration, which slowly restores health over time.
- Potion of Leaping: Made with Rabbit’s Foot as a modifier, a Potion of Leaping grants you the ability to jump higher than normal for a period.
These are just a few examples of the potions you can create using a brewing stand. By experimenting with different combinations of primary ingredients and modifiers, you can unlock a wide range of effects and durations to suit your gameplay style and needs. Additionally, you can convert potions into splash potions or lingering potions for area-of-effect or lingering effects. Get creative and explore the vast potential of potion brewing in Minecraft!
Conclusion!
In conclusion, knowing how to make a brewing stand in Minecraft is a valuable skill that opens up a world of possibilities in potion brewing. By following a simple crafting recipe and gathering the necessary materials, you can create your own brewing stand. Once you have a brewing stand, you can begin brewing a variety of potions with different effects and durations.
With a brewing stand, you can concoct potions that provide healing, strength, invisibility, night vision, fire resistance, swiftness, water breathing, regeneration, leaping, and many more beneficial effects. These potions can greatly enhance your abilities, help you navigate challenging environments, and provide strategic advantages in combat.


