
Minecraft, the wildly popular sandbox game, has captivated players worldwide with its limitless creativity and expansive virtual world. One of the fundamental building blocks of this digital realm is the concept of “chunks.” Chunks are the basic units that make up the Minecraft landscape, forming the foundation upon which players construct their imaginative creations. Understanding how to see and interact with chunks is a crucial skill for any aspiring Minecraft builder or explorer.
In this guide, we will delve into the fascinating world of chunks in Minecraft, unraveling their significance and unveiling techniques to visualize and navigate through them. Whether you’re a newcomer to the game or a seasoned player looking to enhance your understanding, this exploration into chunks will equip you with invaluable knowledge to take your Minecraft adventures to new heights.
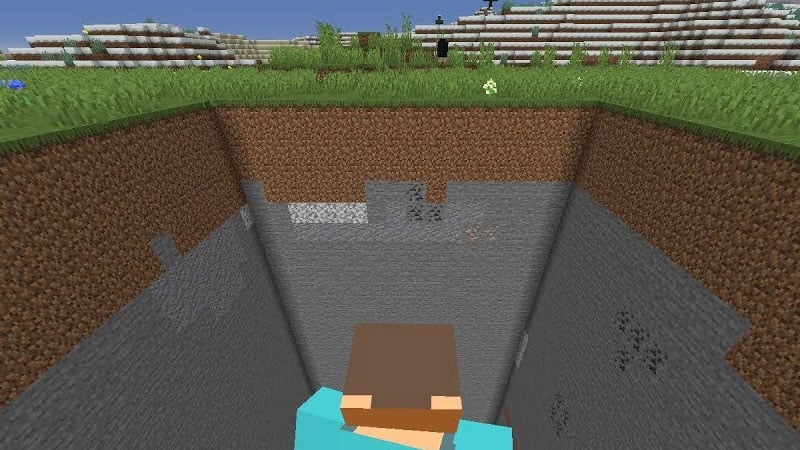
Firstly, we will demystify the concept of chunks, explaining how they function and their importance within the game. Each chunk represents a 16×16 block area in the Minecraft world, acting as a building block for the game’s terrain generation, structures, and various game mechanics. Understanding this fundamental unit is key to comprehending the game’s mechanics and optimizing your gameplay experience.
Next, we will dive into the techniques and tools available to visualize and observe chunks in Minecraft. From the F3 debug screen, which displays valuable information about the game world, to external tools and mods that offer enhanced chunk visualization, we will explore a range of methods to uncover the boundaries and details of individual chunks.
Furthermore, we will discuss the advantages of chunk exploration and how it can benefit players in various aspects of the game. By learning to identify and navigate through chunks, you can efficiently locate resources, plan building projects, optimize redstone contraptions, and even increase game performance.
In conclusion, mastering the art of seeing and understanding chunks in Minecraft is an essential skill that opens up a world of possibilities for players. Through this guide, we aim to empower Minecraft enthusiasts with the knowledge and tools necessary to explore, create, and thrive within the vast landscapes of this beloved game. So grab your pickaxe and get ready to embark on a journey into the heart of Minecraft’s building blocks: the elusive and captivating chunks.
How to find chunks in an evergreen query from Minecraft players?
Finding chunks in Minecraft is a common query among players who are eager to explore, build, and optimize their gameplay. Understanding how to locate chunks can greatly enhance your gaming experience and provide valuable insights into the world you inhabit. Here are a few methods to find chunks in Minecraft:
- F3 Debug Screen: Pressing the F3 key (or Fn + F3 on some laptops) brings up the debug screen, which displays various information about the game world, including your current chunk coordinates. Look for the “Chunk” section on the debug screen to see your X, Y, and Z coordinates. This information allows you to identify the chunk you’re currently in.
- External Tools and Mods: There are external tools and mods available that can assist in chunk visualization. Tools like Amidst and Chunkbase allow you to enter your seed or world file and view a map that highlights the locations of various structures and chunks. These tools can be incredibly useful for planning large-scale building projects or locating specific biomes.
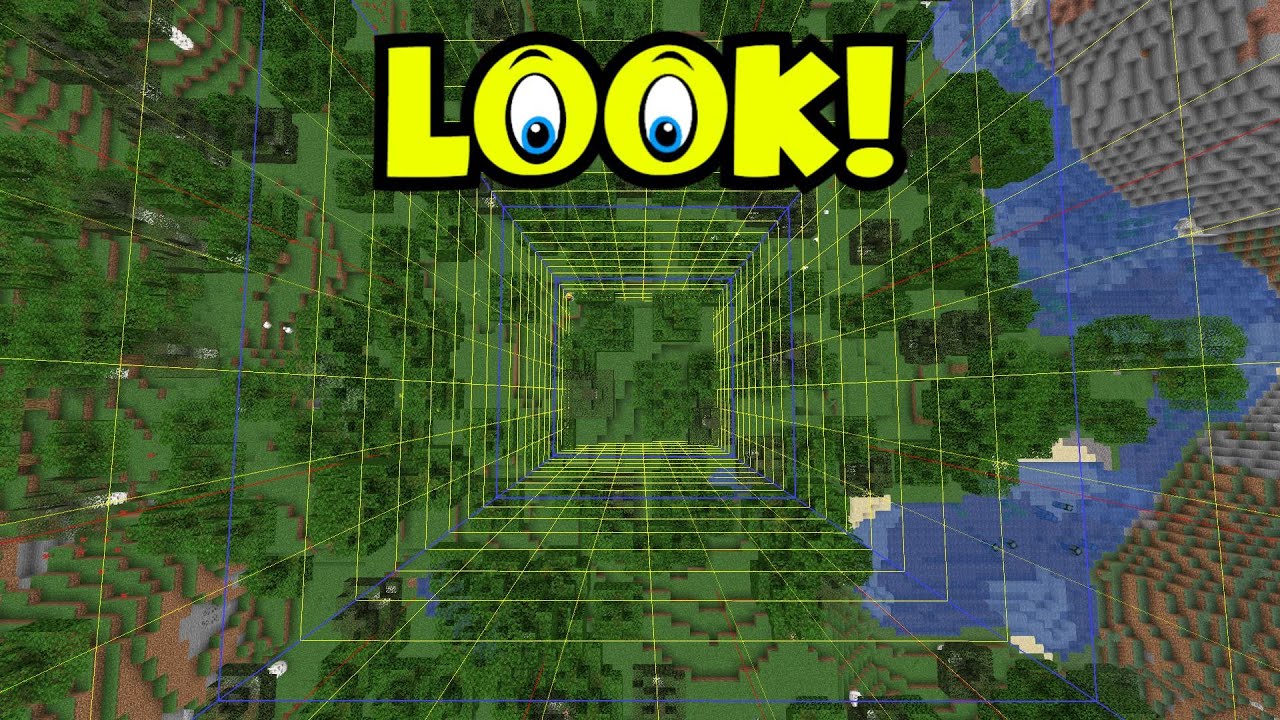
- Chunk Borders: Minecraft has a distinct visual feature that indicates chunk boundaries. These borders are visible as faint lines on the terrain, forming a grid-like pattern across the landscape. By paying close attention to these lines, you can identify the boundaries of individual chunks. It’s worth noting that chunk borders can sometimes be more visible when the game is running in certain graphic settings.
- Exploratory Techniques: Exploring your Minecraft world manually is another way to find chunks. By moving through different areas, you’ll notice changes in terrain, biome types, and structure generation. These shifts often indicate transitions between chunks. Observing these alterations can help you map out the boundaries and locations of various chunks.
- In-game Map: If you have an in-game map, it can provide a visual representation of explored chunks. The map may reveal a grid-like pattern, indicating individual chunks and their boundaries.
Remember, Minecraft’s world generation is procedurally generated, meaning each world is unique. As a result, the techniques mentioned above may vary slightly depending on the version of Minecraft you’re playing. It’s always a good idea to stay up to date with the latest tools and resources available within the Minecraft community to ensure the most accurate and efficient chunk exploration experience.
By utilizing these methods, Minecraft players can gain a better understanding of the game’s mechanics, optimize their gameplay, and embark on exciting new adventures within the vast world of Minecraft. Happy chunk exploring!
How To See Chunks In Minecraft PE?
In Minecraft Pocket Edition (PE), also known as Minecraft Bedrock Edition, the process of seeing chunks is slightly different compared to the Java Edition. Here’s a guide on how to see chunks in Minecraft PE:
- Debug Screen: Unfortunately, Minecraft PE does not have a built-in debug screen like the Java Edition’s F3 menu. Therefore, you won’t be able to directly see the coordinates of the chunk you’re in. However, there are alternative methods you can use.
- Chunk Visualizer Mods/Add-ons: Similar to the Java Edition, there are mods and add-ons available for Minecraft PE that provide chunk visualization. These mods/add-ons can be downloaded and installed from external sources. Look for ones specifically designed for Minecraft PE and follow the installation instructions provided by the mod/add-on creators.
- Chunk Visualizer Texture Packs: Another way to see chunks in Minecraft PE is by using texture packs specifically created for chunk visualization. These texture packs alter the appearance of certain blocks, making it easier to identify chunk boundaries. Look for texture packs designed for chunk visualization and apply them to your Minecraft PE game.
- Third-Party Mapping Tools: There are third-party mapping tools available for Minecraft PE that can assist in chunk visualization. These tools often require you to upload your world file and then provide a map with visible chunk boundaries. Tools like MCPE Viz, MCC Toolchest PE, or Amidst PE (Amidst for PE) can help you achieve this. Make sure to follow the instructions provided by the tool’s developers to ensure accurate results.
- Observe Terrain Transitions: Another method is to pay attention to transitions in terrain, such as changes in biome types or variations in the landscape. These transitions often indicate the boundaries between different chunks.
It’s important to note that the availability and functionality of mods, add-ons, texture packs, and mapping tools can vary, so always ensure you download them from reputable sources. Additionally, keep in mind that Minecraft PE is constantly evolving, so it’s a good idea to stay updated with the latest version of the game and compatible tools for the best experience.
By utilizing these methods, Minecraft PE players can gain a better understanding of the chunk layout in their world, which can be helpful for various activities such as building, resource gathering, and exploring. Enjoy your adventures in Minecraft PE and happy chunk exploration!
How To See Chunks In Minecraft Mobile?
In Minecraft Mobile, which includes both Minecraft Pocket Edition (PE) and Minecraft Bedrock Edition, you can explore and observe chunks using the following methods:
- Chunk Visualizer Texture Packs: Similar to Minecraft PE, you can use chunk visualizer texture packs specifically designed for mobile devices. These texture packs modify the appearance of blocks to make chunk boundaries more visible. Look for texture packs created for mobile versions of Minecraft and install them following the instructions provided by the pack’s creator.
- Third-Party Mapping Tools: Some third-party mapping tools have mobile versions available, allowing you to visualize chunks in Minecraft Mobile. These tools usually require you to upload your world file and generate a map with chunk boundaries marked. Tools like Mapcrafter or Chunky can be compatible with Minecraft Mobile. Make sure to follow the instructions provided by the tool’s developers for accurate results.
- Terrain Transitions: Similar to other versions of Minecraft, observing transitions in terrain can help you identify chunk boundaries. Pay attention to changes in biome types, variations in landscape features, or shifts in generated structures. These transitions often indicate the boundaries between different chunks.
- Chunk Visualizer Mods/Add-ons: Minecraft Mobile also supports mods and add-ons, although the availability and functionality may vary. Look for mods or add-ons specifically designed for Minecraft Mobile that offer chunk visualization. Follow the installation instructions provided by the mod/add-on creators to utilize their features.
Remember to download mods, texture packs, and mapping tools from trusted sources to ensure the safety of your device and game. It’s also important to stay updated with the latest version of Minecraft Mobile and compatible tools to ensure compatibility and optimal performance.
By utilizing these methods, Minecraft Mobile players can gain a better understanding of chunk boundaries, which can assist in planning builds, resource gathering, and exploring their world. Enjoy your Minecraft Mobile adventures and happy chunk exploration!
Also, Chunk Line works for all the versions on Minecraft mobile.
Yes, you’re correct. The Chunk Line method is applicable to all versions of Minecraft mobile, including Minecraft Pocket Edition (PE) and Minecraft Bedrock Edition. The Chunk Line technique involves using the game’s inherent chunk border rendering to identify and visualize chunk boundaries.
To enable Chunk Lines in Minecraft mobile, follow these steps:
- Open the game and go to the “Settings” menu.
- Select “Video” or “Graphics” settings (the exact option name may vary depending on the version).
- Look for an option called “Chunk Borders,” “Chunk Lines,” or something similar.
- Enable the option to display chunk lines on the screen.
Once enabled, the game will display faint lines on the terrain, forming a grid-like pattern that represents the boundaries between chunks. This feature helps you identify individual chunks and plan your activities accordingly.
By utilizing the Chunk Line method, you can easily observe and navigate through chunks in Minecraft mobile, aiding in resource gathering, building, and exploring your world more effectively.
Please note that the availability and name of the Chunk Line option may vary slightly depending on the specific version of Minecraft mobile you are playing. However, most versions should have a similar feature that allows you to display chunk borders or lines.
Enjoy your Minecraft mobile adventures and happy chunk exploration!
Conclusion!
In conclusion, there are several methods you can employ to see and identify chunks in Minecraft, regardless of the version you’re playing. Utilize the F3 Debug Screen (Java Edition) Pressing F3 (or Fn + F3 on some laptops) in the Java Edition brings up the debug screen, which displays your current chunk coordinates. This allows you to determine the chunk you’re in. External Tools and Mods: There are external tools, mods, and add-ons available that provide chunk visualization. These tools can offer maps, highlight chunk boundaries, and even provide additional information about structures and biomes


